Fascia Integration on a Standing Seam Metal Roof

How fascia, eave trim and rake trim tie into a standing seam roof: the layers, the order, the fastening rules and the checks that prevent callbacks.
Fascia integration on a standing seam roof comes down to three decisions: how the panel ends at the eave, how the trim that covers the fascia is fastened, and how water leaves the roof edge. Get those right and the panel can move with temperature while the edge stays tight. Get them wrong and you see it as rot at the fascia top, oil-canned trim or a leak that surfaces a year later. The panel length, the eave hem and the trim package all have to be planned together, which is why we treat them as one order.
This guide is for roofing contractors, builders and metal roof installers. It walks through the layers of a fascia detail, the eave and the rake, the fastening rules, the gutter and no-gutter variations, and a pre-order checklist.
TL;DR
- A fascia detail is a stack in a set order: deck, underlayment where required, eave flashing or drip edge, panel, then fascia trim and, if used, a gutter.
- Standing seam panels run ridge to eave as one piece on concealed clips, so trim must never pin the panel down. Thermal movement has to be allowed for.
- In high-wind zones, drip edge laps at least 3 inches and is fastened to the deck at no more than 4 inches on center.
- Rake ends need their own detail, and the air and water barrier has to stay continuous around the corner.
- Order panels, trim and flashing together with measured lengths. Mismatches at the eave are the most common source of field cutting and rework.
Table of Contents
- What a standing seam fascia detail is made of
- How the panel meets the eave
- Flashing, overlap and fastening at the edge
- The rake: where the fascia detail turns the corner
- Fascia with gutters and without
- Pre-order checklist for contractors
- Related details that use the same logic
- Ordering panels and trim for the fascia
- Our perspective
- FAQ
- Sources
What a standing seam fascia detail is made of
A typical eave detail may include a roof deck or purlins, underlayment when required, an ice barrier where code requires it, eave flashing or drip edge, the roof panel, fascia, and possibly a gutter. One roofing resource describes this stack and notes that standing seam systems often use concealed clips. The order matters more than any single part, because water has to be able to run over each layer onto the one below it.
Think of it from the top down:
- Panel. It sheds the water and ends at the eave with a hem or an eave closure.
- Eave flashing or drip edge. It carries water off the deck edge and away from the fascia board.
- Fascia. It is the weather face of the roof edge. It also does structural work for the rainwater system, and water sitting at its top edge can quietly weaken it.
- Gutter, where there is one. It attaches to the fascia, so the fascia has to be sound and flat.
Standing seam panels are site made, attached with concealed fasteners to clips, and normally installed as one long, continuous piece from ridge to eave. That single fact drives everything about the fascia trim. The panel is long, it expands and contracts, and the trim at the bottom has to let it.
How the panel meets the eave
Metal building guidance explains the mechanics. Standing seam panels connect to purlins with clips embedded in the seams, and the clips are screwed to the purlin flanges with self-drilling screws. Panel penetrations occur at the eave or ridge and at panel end laps. The same guide says that because concealed-fastener panels have so few penetrations, they form a watertight membrane.
That is why the eave is the critical point. The field of the roof has almost no holes. The edge is where you add them, so the edge is where you can lose the advantage.
Eave hem or closure
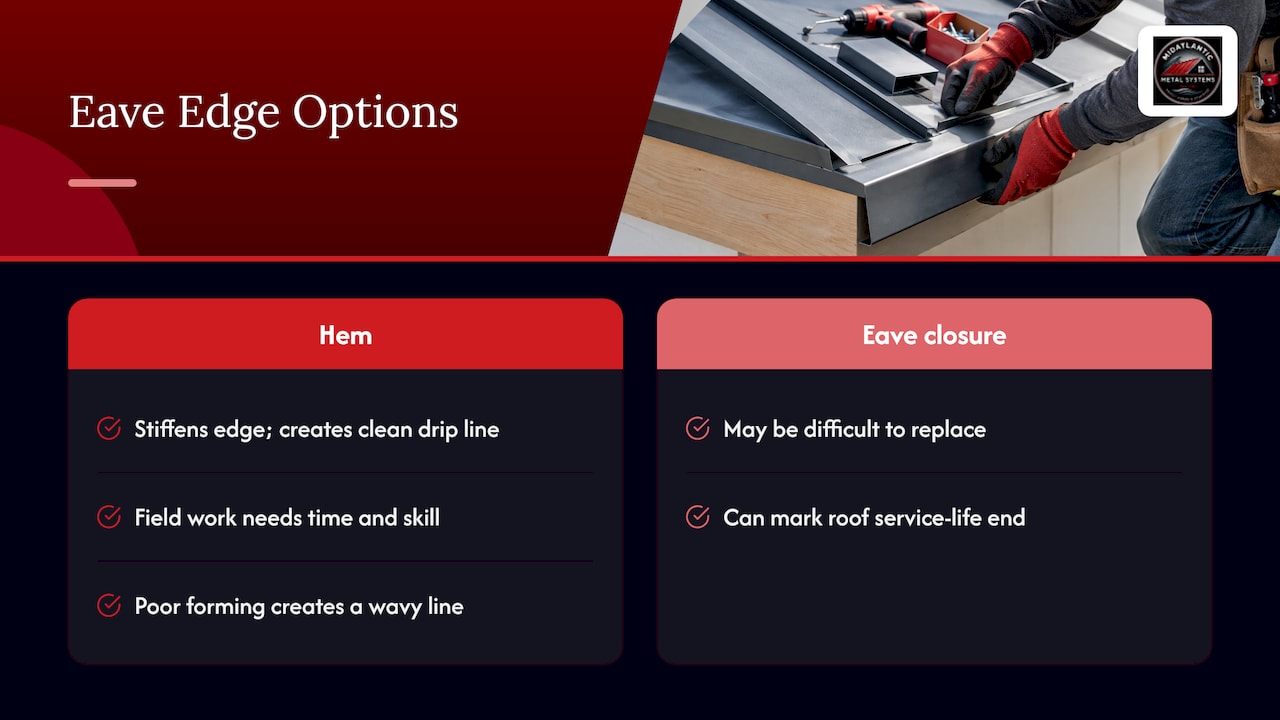
The bottom of the panel is normally finished with a hem or an eave closure, and the choice has consequences. The hem stiffens the edge and gives a clean drip line. Hemming in the field takes time and skill, and a poorly formed hem shows as a wavy line along the whole roof. Eave closures can also be hard to reach later: depending on the detail, an eave closure may be difficult to replace and can mark the end of the roof system’s service life. Treat the eave as a part you install once and plan accordingly.
We wrote up how factory preparation changes this step in our piece on notched panels and eave hemming. The short version is that cutting and hemming at the eave in the field is labor you can plan out of the job.
Keep the trim from pinning the panel
Standing seam is designed to move. Its ability to accommodate thermal movement comes with compromised purlin lateral support, which depends on the panel profile and clip details. In practice, that means two rules at the fascia:
- Do not fasten through the panel face into the fascia or trim in a way that locks the panel in place.
- Fasten the trim to the substrate, not to the moving panel, and use hem and cleat details that let the panel slide.
Clip sizing is its own topic. If your roof runs are long, read our guide on sizing thermal clips with SMACNA before you finalize the eave.
Flashing, overlap and fastening at the edge
The numbers worth memorizing come from one place. At eaves and rakes in high-wind zones, drip edges should lap at least 3 inches and be fastened to the roof deck at a maximum of 4-inch spacing, with fasteners compatible with the flashing. Two practical points follow:
- Compatible fasteners. Mixing metals at the edge, where water sits and drips, invites galvanic corrosion. Match fastener and flashing material, and check the finish too.
- Lap direction. Laps should shed water downslope. Walk the roof edge in your head and ask which way water runs at each joint.
Whether your jurisdiction requires drip edge on a metal roof, and at what dimensions, is set by your local code and the panel manufacturer’s instructions. Confirm both before you order trim.
Order of installation at the eave
- Check that the fascia board is straight, sound and flush. A wavy fascia telegraphs through the trim.
- Install underlayment and any code-required ice barrier so that water flows over the lower layer.
- Set the eave flashing or drip edge, lapped and fastened to the deck at the spacing above.
- Set the starter and panel, with the hem or closure at the line you planned.
- Install the fascia trim, fastened to the substrate and not to the panel face.
- Add gutter hangers or brackets to the fascia, not through the roof panel.
On a job where the trim, panel and flashing come as separate orders from separate places, step 3 to step 5 is where the mismatches show up. Our trim and flashing packages are coordinated with the panels so the pieces arrive meant for each other.
The rake: where the fascia detail turns the corner
The eave sheds water, but the rake is where wind pushes it sideways, and the fascia detail has to change. Air and water barrier continuity matters at the corner: maintaining continuous air-barrier continuity at wall-to-roof interfaces, including eaves and rakes, is essential. At rake ends where there is no continuous framing other than the rake angle, the 2023 best practices recommend a narrow piece of facing to join the roof and wall air barriers, sealed with tape.
Three details to settle at the rake:
- Where the rake trim sits relative to the last panel. The last seam and the trim must not trap water.
- How the trim ties into the eave. The eave and rake pieces meet at the corner, and that joint is the most commonly cut and re-cut in the field.
- How the trim is fastened. Same rule as the eave: allow the panel to move.
We cover this in depth in our rake trim guide for standing seam roofs.
Fascia with gutters and without
Standing seam roofs can be installed without traditional gutters, because water leaves a smooth metal surface in a different way than it does from shingles. That changes the detail in a few ways.
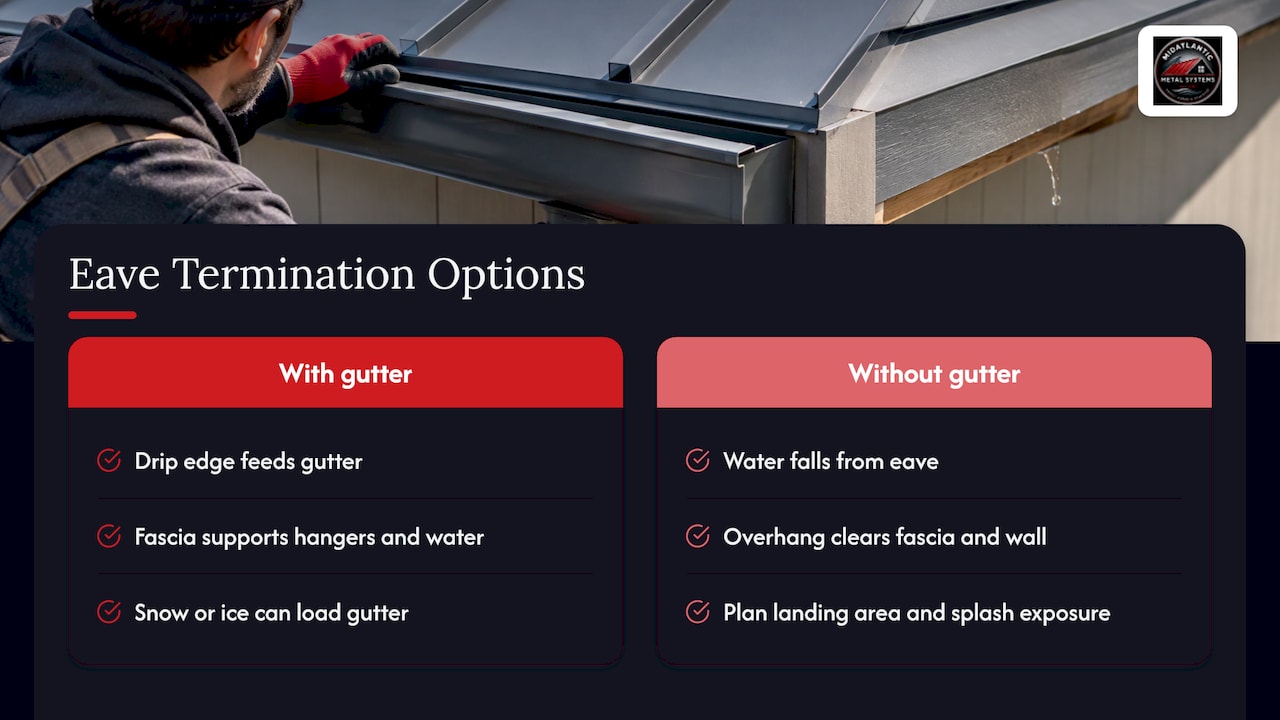
With a gutter. The fascia is a mounting surface. It must be flat, sound and strong enough to carry the hangers and the weight of water. The drip edge or eave flashing must deliver water into the gutter, not behind it. Snow and ice sliding off a smooth metal panel can load a gutter, so ask early whether snow retention is part of the plan.
Without a gutter. Water falls from the eave line, so the drip line has to be clean and the overhang has to throw it clear of the fascia and wall. Plan for where the water lands: grade, walkways and landscaping below the eave. The fascia itself sees more splash, so material and finish at the lower edge deserve attention.
Both variations use the same layers described above. What changes is the final termination, and that is a decision to make with the owner before panels are cut, not after the trim arrives.
Pre-order checklist for contractors
Before you send a takeoff for panels and trim, verify the following:
| Check | Why it matters |
|---|---|
| Roof run length, eave to ridge | Sets panel length and thermal movement at the eave |
| Eave type: hemmed, closure, or starter | Decides panel prep and who does the hemming |
| Gutter or no gutter | Decides the final termination and the drip line |
| Drip edge laps and fastener spacing | Wind zone and manufacturer requirements govern |
| Rake condition and corner joints | Prevents re-cutting at the eave and rake junction |
| Fascia condition | Rot or waviness shows through the trim |
| Panel gauge and finish | Trim should match the panel material and color |
| Code and manufacturer instructions | Local rules and panel instructions take precedence |
Color is part of this list. Trim that does not match the panel is a visible mistake on a fascia line, so settle panel color at the same time as the trim.
Related details that use the same logic
The fascia is one of several terminations, and the same thinking applies elsewhere on the roof: let the panel move, keep laps shedding downslope, limit penetrations. If your project has these, see our notes on sidewall flashing in 26 gauge, slope transitions, chimney flashing and skylight flashing.
Ordering panels and trim for the fascia
We supply contractors, builders and general contractors across Virginia, Maryland, Washington DC, Pennsylvania and West Virginia. Our 1-inch mechanical lock and 1.5-inch snap lock standing seam panels are made with Englert metal systems in 24-gauge and 26-gauge steel. With cut-and-drop delivery, panels arrive at the job site in custom lengths, so the eave line is set by your takeoff and not by field trimming. Where access or length is a problem, on-site roll forming is available. Trim, flashing and fasteners can be ordered with the panels through contractor supply.

To see the profiles and specifications before you quote, start with our standing seam panel lines.
Our perspective
Most fascia problems we hear about on standing seam jobs start before anyone touches the roof. The panel length was guessed, the trim came from somewhere else, and the eave was hemmed in the field under time pressure.
Our view is that the eave should be decided on paper. Measure the run, choose the eave detail, choose gutter or no gutter, and order the panel and the trim as one package. That is why we focus on custom-length, cut-and-drop panels delivered to the job site, with trim and flashing coordinated to match.
When the panel arrives at the right length and the trim is made for it, the crew spends its time installing, not adjusting. That is what we built our supply around, and it is what we recommend to every contractor we work with.
Matt Catino
FAQ
What is fascia integration on a standing seam roof?
It is the way the panel, eave flashing or drip edge, fascia trim and any gutter fit together at the roof edge. The goal is to shed water off the edge, keep the panel free to expand and contract, and protect the fascia board from moisture.
Can I fasten fascia trim through the standing seam panel?
Avoid it. Standing seam panels are held by concealed clips so that they can move with temperature. Fastening trim through the panel face can pin it in place, and the panel then has to move somewhere else. Fasten trim to the substrate and use details that let the panel slide.
How far should drip edge laps overlap?
In high-wind zones, drip edges should lap at least 3 inches and be fastened to the deck at no more than 4 inches on center. Always check your local code and the panel manufacturer’s instructions, since they set the requirement for your job.
Does a standing seam roof need gutters?
Not necessarily. Standing seam roofs can be installed without traditional gutters. If you skip them, plan the drip line and the ground below the eave so water does not splash onto the fascia and wall.
Sources
- Metal Roofs, Building America Solution Center
- Roof Edge Protection, Building America Solution Center
- MBMA Best Practices to Comply with Whole-Building Air Leakage Testing Requirements
- MBMA Roof Framing Design Guide for Metal Building Systems, 2024 Edition
- Zinc Alloy-Coated Steel Standing Seam Roofing, ASTM paper
- Metal Roof Overhang Detail: Eaves, Rakes, Flashing
- Roof Eaves and Fascia System, Build Design Hub