Match Gutters to Metal Panels to Keep the Warranty for Contractors
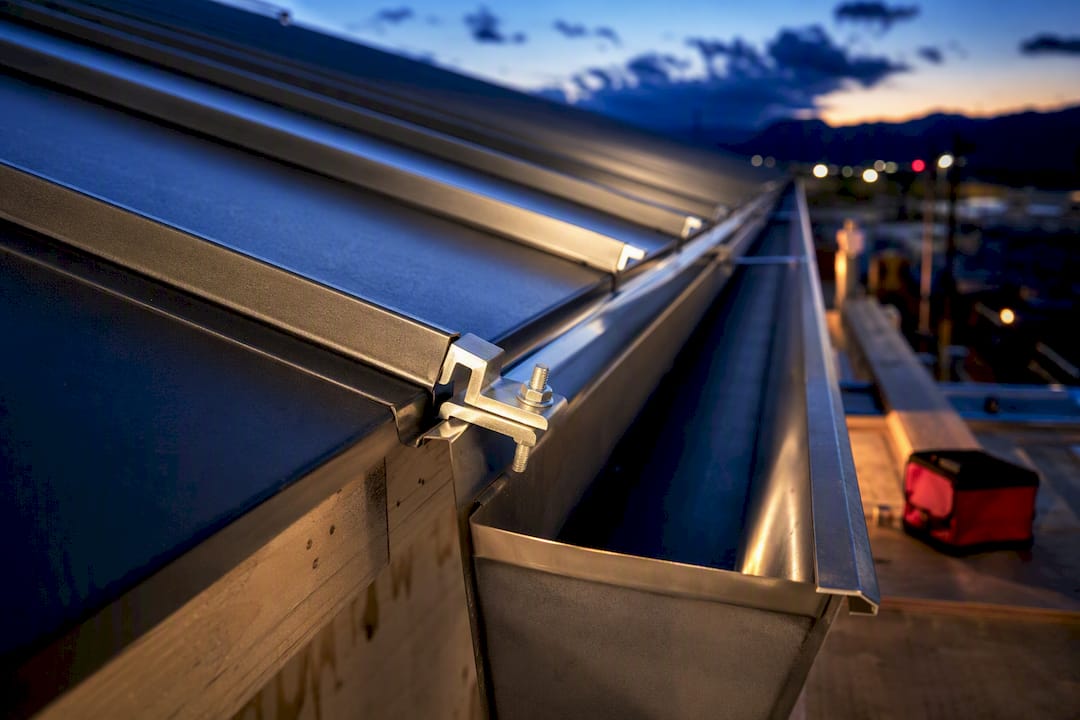
Installer focused tips for attaching gutters to metal panels without voiding the roof warranty. Match attachment to panel profile and protect the warranty.
Yes, gutters can be attached to a metal roof, but only when you avoid unnecessary panel penetrations and match the attachment method to the roof profile. The single rule that governs everything else: never fasten a gutter through the roofing panel itself unless the manufacturer explicitly says it’s fine. Anchor to fascia, rafter tails, or approved seam clamps instead, and plan on beefier hangers because metal sheds water faster than shingles ever will.
TL;DR:
- Attach gutters to fascia, rafter tails, or seam clamps, avoiding panels unless explicitly approved by the manufacturer, to prevent damage or warranty voids.
- Use non-penetrating seam clamps for standing seam roofs and match hanger style to the panel profile for corrugated or exposed-fastener panels to ensure longevity.
- Anchor hangers into solid wood behind the fascia, such as rafter tails or backing boards, to prevent sagging and ensure reliable support.
- Increase gutter and downspout size for steep pitches or heavy rainfall, and install additional outlets on long runs to prevent overflow.
- Regularly inspect gutters twice a year, focusing on hanger tightness, corrosion, sealant integrity, and proper channel drainage to extend system life.
Table of Contents
- Gutter Attachment Metal Roof Methods by Panel Profile
- Where Should Gutter Hangers Actually Anchor?
- Hanger Types, Spacing, and Placement That Hold Up
- Sizing Gutters and Downspouts for Fast Metal Runoff
- Drip Edge, Flashing, and Corrosion Compatibility
- Do Gutter Guards Work on Metal Roofs?
- Installation Checklist: How to Test a Metal Roof Gutter System
- Mid-Atlantic Metal Panels’ Take on Contractor-Ready Gutter Details
- Thermal Movement and Why Rigid Gutter Attachments Fail
- Choosing Fasteners That Won’t Corrode Your Gutter System
- Integrating Flashing Between the Gutter and the Roof
- How Often Should You Inspect Metal Roof Gutters?
- Where to Find Authoritative Metal Roof Gutter Guidance
- Get the Panel Details Right Before the Gutters Go Up
- Sources
Gutter Attachment Metal Roof Methods by Panel Profile
The roof profile decides your attachment strategy before anything else does. Standing seam, corrugated, and exposed-fastener panels each behave differently under load, and treating them the same is how installs fail early.
Standing seam roofs give you the cleanest option: seam clamps engineered for that specific seam height and shape. These clamp onto the rib without piercing the panel, which keeps the manufacturer’s warranty intact and lets the panel expand and contract freely underneath. Where clamps aren’t practical, fascia-mounted gutters bypass the panel question entirely.
Corrugated and exposed-fastener panels don’t offer a seam to grab, so fascia or rafter-tail attachment is the default. If a job genuinely requires roof-side brackets, installer guidance recommends matching hanger style to the panel profile, placing fasteners on the high ribs rather than the flat pans, and detailing every penetration with butyl tape and a compatible washer.
When a roof-side fastener truly can’t be avoided, torque it enough to seat the washer without crushing it, seal the penetration, and use hardware rated for the panel’s coating.
- Standing seam: non-penetrating seam clamps or fascia mounting
- Corrugated/exposed-fastener: fascia or rafter-tail attachment preferred
- Unavoidable roof penetrations: seal, torque correctly, match metal chemistry
Pro Tip: Ask the panel manufacturer for their written stance on gutter clamps before bidding the job. Some standing seam systems specify an exact clamp model, and using the wrong one can void coverage even though the panel itself was never drilled.
Where Should Gutter Hangers Actually Anchor?
Hangers need solid wood behind them, not a thin fascia board hanging on for dear life. Rafter tails or blocking give you decades of holding power; a warped one-by-six fascia gives you a callback in two years.
- Find the framing. Pop a soffit panel or use a stud finder to locate rafter tails behind the fascia before you drive a single screw.
- Add backing if needed. If the fascia is thin, damaged, or floating without rafter tails behind it, sister in a pressure-treated backing board so hangers have real substance to bite into.
- Choose corrosion-compatible fasteners. Stainless steel or coated deck screws, long enough to penetrate at least an inch and a half into solid wood, paired with washers that won’t react with the panel’s metal.
Retrofit installs especially benefit from checking fascia condition and structural backing first, since older homes often have fascia that looks fine but has gone soft from years of splash-back.
Hanger Types, Spacing, and Placement That Hold Up
Hidden hangers that screw directly into rafter tails are the strongest and cleanest option on almost any metal roof. They disappear behind the gutter lip, resist the twisting force of heavy runoff, and don’t interrupt the roofline the way strap hangers can.
Spacing matters more here than on an asphalt roof. Metal sheds water in a fast, concentrated sheet rather than a slow soak, and snow can slide off in a single mass that yanks on every hanger at once.
- Standard spacing on shingle roofs often runs around two to three feet; under metal roofs, spacing is generally tighter, closer together to support the increased load.
- Cluster hangers more tightly near corners, seams, and downspout outlets, where load concentrates.
- If you use strap or face-mounted hangers instead of hidden ones, make sure they follow the panel’s rib profile exactly and seal wherever they contact trim.
Loose hangers are the number one reason gutters sag mid-season on metal roofs. Tight spacing up front costs a few extra screws and saves a return trip.
Sizing Gutters and Downspouts for Fast Metal Runoff
Standard 5 inch gutters work fine on plenty of metal roofs, but steep pitches, long roof runs, and heavy-rainfall regions often call for 6 inch gutters instead. Metal panels shed water in a fast, unbroken sheet with almost none of the friction a shingle surface creates, so the trough that handled asphalt runoff comfortably can overshoot under metal.
Statistic Snapshot: A metal roof can deliver water to the gutter at a noticeably higher velocity than shingles at the same pitch, which is why sizing that “worked before” on an old roof deserves a second look on a new metal one.
Downspout planning matters as much as trough width. Regional installer experience shows undersized gutters and too few outlets are a leading cause of repeat overflow failures on metal roofs, so:
- Place outlets where runoff naturally collects, usually at valleys or the low end of long straight runs.
- Add extra downspouts on long runs instead of relying only on one at the end.
- Slope the gutter about 1/4 inch per 10 feet toward each outlet, then confirm the flow with a hose test before you drive the final screw.
Drip Edge, Flashing, and Corrosion Compatibility
The drip edge is what keeps water from sneaking behind the gutter and rotting the fascia underneath. It should extend far enough over the gutter’s back edge that runoff drops cleanly into the trough instead of clinging to the underside of the panel and running backward.
Where the gutter and roof meet, sealing quality decides whether the joint lasts one season or twenty. Approved gutter sealant, not general-purpose caulk, is what installers use at end caps, outlets, and lap joints, since ordinary caulk tends to crack under the temperature swings a metal roof experiences.
- Tuck the gutter’s back edge under the drip hem wherever the trim design allows it.
- Seal end caps, outlet holes, and every lap joint with a sealant rated for exterior metal.
- Never let dissimilar metals touch directly. Aluminum gutters against uncoated steel fasteners, for instance, invite galvanic corrosion.
Pro Tip: Keep a small tube of manufacturer-matched sealant in the truck. General silicone caulk looks fine on install day and fails within a year on a roof that swings 100 plus degrees between January and July.
Do Gutter Guards Work on Metal Roofs?
Some do, but plenty don’t, and the failure mode is almost always the same: flat or fine-mesh guards let water skim right over the top instead of dropping into the trough during a heavy storm, because metal roofs deliver runoff as a fast sheet rather than a gentle trickle.
Before committing to any guard, run a hose at the roof’s high point and watch what happens at storm-level flow, not just a light drizzle.
- Skip ultra-fine mesh and flat surface guards on steep metal roofs; they’re built for slower shingle runoff.
- Favor guards with a raised nose or curved profile designed to slow the sheet before it reaches the edge.
- Budget for periodic clearing even on “low-maintenance” guards, since debris and grit still collect at outlets over time.
Installation Checklist: How to Test a Metal Roof Gutter System
A gutter that looks level on install day can still fail its first real test. Building the check into the process, rather than trusting it after the fact, is what separates a lasting install from a callback.
- Measure the roof area, mark planned outlet locations, and snap a slope line at roughly 1/4 inch per 10 feet toward each one.
- Dry-fit every gutter section before fastening anything permanently, checking that seams and outlets line up with your marked slope.
- Seal joints, end caps, and outlets, then install hangers into confirmed solid backing at tightened spacing.
- Run a hose test from the high end of the run and watch the full length for pooling, backflow, or slow spots.
- After the first heavy rain, walk the roofline again to check hanger tightness, confirm outlets are draining freely, and look for water tracking behind the gutter.
Statistic Snapshot: Storm testing and a post-rain walk-through cost roughly an hour of labor, far less than the cost of pulling a sagging gutter run and redoing the backing six months later.
Mid-Atlantic Metal Panels’ Take on Contractor-Ready Gutter Details
A supplier provides architectural standing seam roofing panels to contractors in several Mid-Atlantic states, offering turnaround built around jobsite schedules rather than warehouse stock. Our 1" mechanical lock and 1.5" snap lock panels run on premium Englert metal systems in 24-gauge and 26-gauge steel, profiles that dictate which seam clamps and trim details will actually fit. Cut-and-drop delivery and on-site roll forming mean contractors get panel lengths and matching eave trim built for the specific gutter plan, not a generic stock length that forces field adjustments.
Thermal Movement and Why Rigid Gutter Attachments Fail
Metal roof panels expand and contract with every temperature swing, moving noticeably more across a long run than most contractors expect from a material that looks perfectly rigid. A steel panel exposed to full sun can grow and shrink enough over a day that any attachment rigidly locked to both the panel and a fixed gutter point will eventually work loose, crack a seal, or bend a bracket.
This is exactly why fascia-mounted hangers and non-penetrating seam clamps outperform rigid roof-side brackets over time. Fascia and rafter tails don’t move with the panel, so a hanger anchored there stays put while the roof above it flexes independently. A clamp system built for standing seam is designed with that movement in mind, gripping the rib firmly enough to hold a gutter’s weight while still allowing the panel to slide slightly beneath it during temperature swings.
Where roof-side fasteners are unavoidable, oversized or slotted holes paired with a flexible sealant give the panel somewhere to move without tearing the seal loose. A fastener driven tight into an undersized hole with rigid caulk is a stress point waiting for the next hot afternoon or cold night to crack it open. Contractors who have chased leak callbacks on metal roofs almost always trace them back to a rigid connection that never accounted for how much the panel actually moves across a season, not a bad sealant brand or a cheap hanger.
Choosing Fasteners That Won’t Corrode Your Gutter System
Galvanic corrosion happens when two dissimilar metals touch in the presence of moisture, and a gutter system gives it plenty of opportunities: aluminum gutters, steel panels, and whatever fastener the installer grabbed off the truck. Get the pairing wrong and you’ll see white corrosion streaks or pitted metal within a season or two, right at every screw and clamp point.
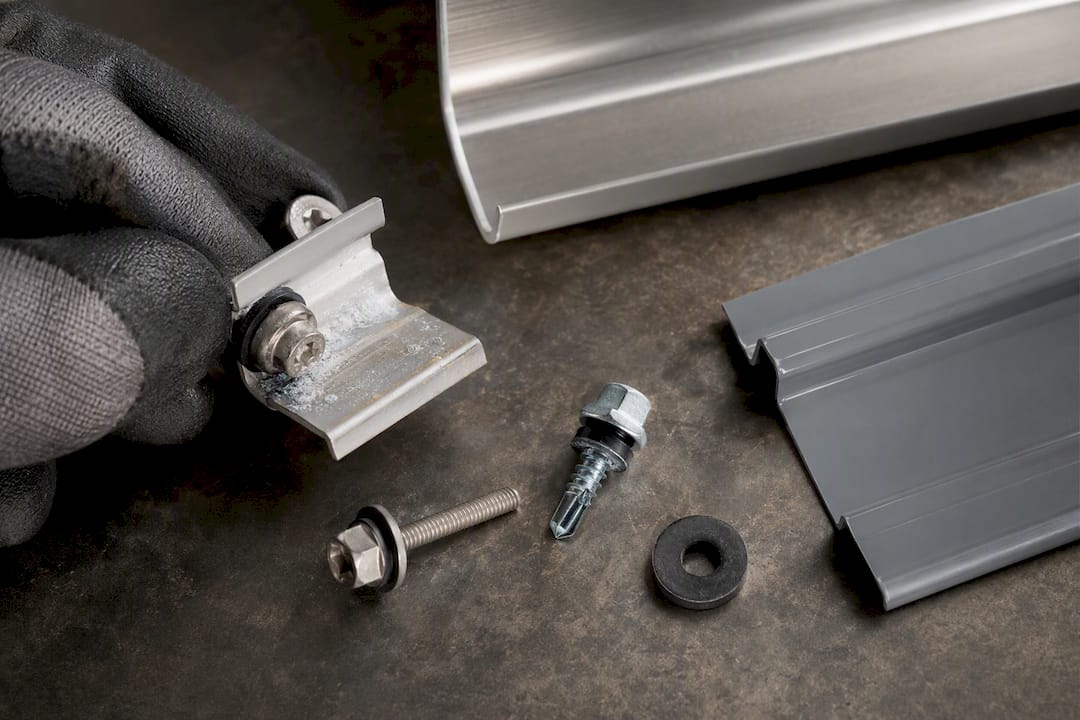
The safest general rule is to match fastener material to the dominant metal in the assembly. Aluminum gutters call for stainless steel or aluminum fasteners with a compatible washer, never plain zinc-coated steel screws that will react against the aluminum over time. Steel panels paired with steel hardware need a coating rated for exterior exposure, since bare steel-on-steel contact still rusts without one.
Isolation matters as much as material choice. A rubber or neoprene washer between a fastener head and the panel surface breaks the direct metal-to-metal contact that drives corrosion, even when the fastener itself is compatible. Fastening through metal panels also creates a puncture point that can rust or leak over time and may void the roof’s warranty, reinforcing why fascia attachment stays the preferred route whenever the design allows it.
For anyone speccing hardware, WBDG’s roofing systems guidance offers useful background on material compatibility across different roofing assemblies, worth a read before finalizing a fastener list on an unfamiliar panel type.
Integrating Flashing Between the Gutter and the Roof
Flashing is the detail that decides whether water goes into the gutter or behind it. At the eave, the drip edge needs to extend past the gutter’s back lip far enough that runoff releases cleanly into the trough instead of following the underside of the panel backward toward the fascia.
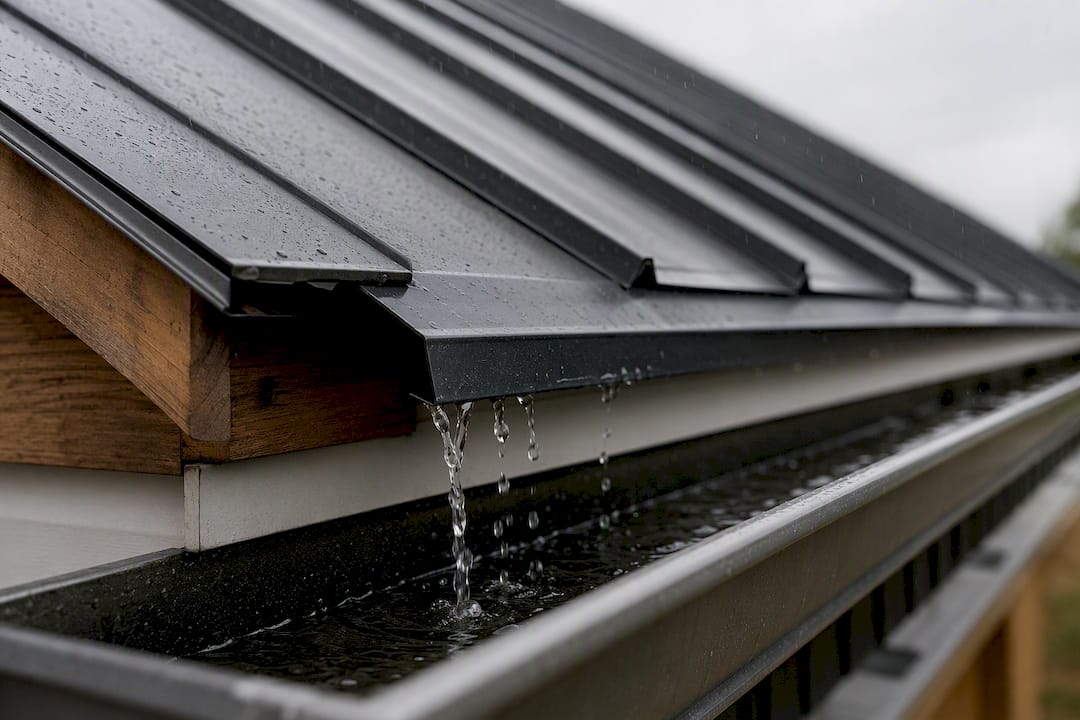
Get this overlap wrong, even by half an inch, and you’ll see staining or rot on the fascia within a year, long before the gutter itself shows any sign of trouble.
Attaching gutters independently of the roofing panels, then sealing every joint with an approved product, is the installation practice that avoids leaks and preserves the manufacturer’s warranty. That means treating the eave trim, the drip edge, and the gutter as one connected system rather than three separate afterthoughts bolted on in sequence.
Valleys and transitions deserve extra attention, since that’s where two roof planes dump concentrated runoff into a single gutter section. Oversized or reinforced flashing at those points, paired with a tighter hanger cluster right below, keeps the joint from working loose under the added load. For contractors detailing custom transitions, trim and flashing packages built to match the panel profile save the guesswork of bending field flashing to fit an odd seam height on-site.
How Often Should You Inspect Metal Roof Gutters?
Twice a year is the baseline: once in late fall before winter runoff picks up, once in spring after pollen, seed pods, and storm debris have had a season to accumulate. Homes under heavy tree cover need a third check mid-summer, since metal roofs shed leaves and needles just as readily as they shed water.
The problems specific to metal roof gutters aren’t the same ones you’d chase on a shingle roof. Watch for:
- Hanger loosening from repeated thermal movement, especially at the ends of long runs where expansion is greatest.
- Corrosion streaking at fastener points, a sign the metal pairing wasn’t compatible from the start.
- Sealant cracking at end caps and outlets, which shows up faster on metal roofs because of the wider temperature swings.
- Backflow staining on the fascia, meaning the drip edge overlap has failed even if the gutter itself looks fine.
A five-minute check after the first hard rain of the season, watching for pooling or a thin sheet of water sneaking behind the gutter, catches most of these issues before they become a repair.
Where to Find Authoritative Metal Roof Gutter Guidance
For deeper technical detail, WBDG’s roofing systems knowledge area and This Old House’s metal roof gutter guide are solid starting points. Always confirm attachment rules against your specific panel manufacturer’s installation guide before making any roof-side penetration.
Get the Panel Details Right Before the Gutters Go Up
Most gutter failures on metal roofs trace back to a decision made weeks before the gutter crew ever showed up: the wrong seam profile ordered, no plan for eave trim, fascia never checked for backing. The conventional advice treats gutter installation as a standalone trade, separate from the roofing job that came before it. That’s backwards. The panel profile, the trim package, and the gutter attachment method are one connected decision, not three.
Where installer advice consistently undersells the risk is thermal movement. Plenty of guides mention expansion and contraction in passing, then move straight to hanger spacing as if it’s the bigger concern. It isn’t. A hanger spaced correctly but rigidly locked to a moving panel will fail before a slightly wider-spaced hanger anchored to fascia ever does.
If you’re a contractor speccing a job, prioritize the panel and trim order first. Get seam profile and eave trim locked in before the gutter crew arrives, and the attachment decisions that follow get dramatically simpler.
— Matt Catino
Sources
- Gutters for metal roof
- How to Install Gutters on a Metal Roof Without Leaks
- Metal roof gutter installation: 2026 guide for DFW storms
- Can You Put Gutters on a Metal Roof?