Hip Flashing on Standing Seam: Hip Cap Details That Hold
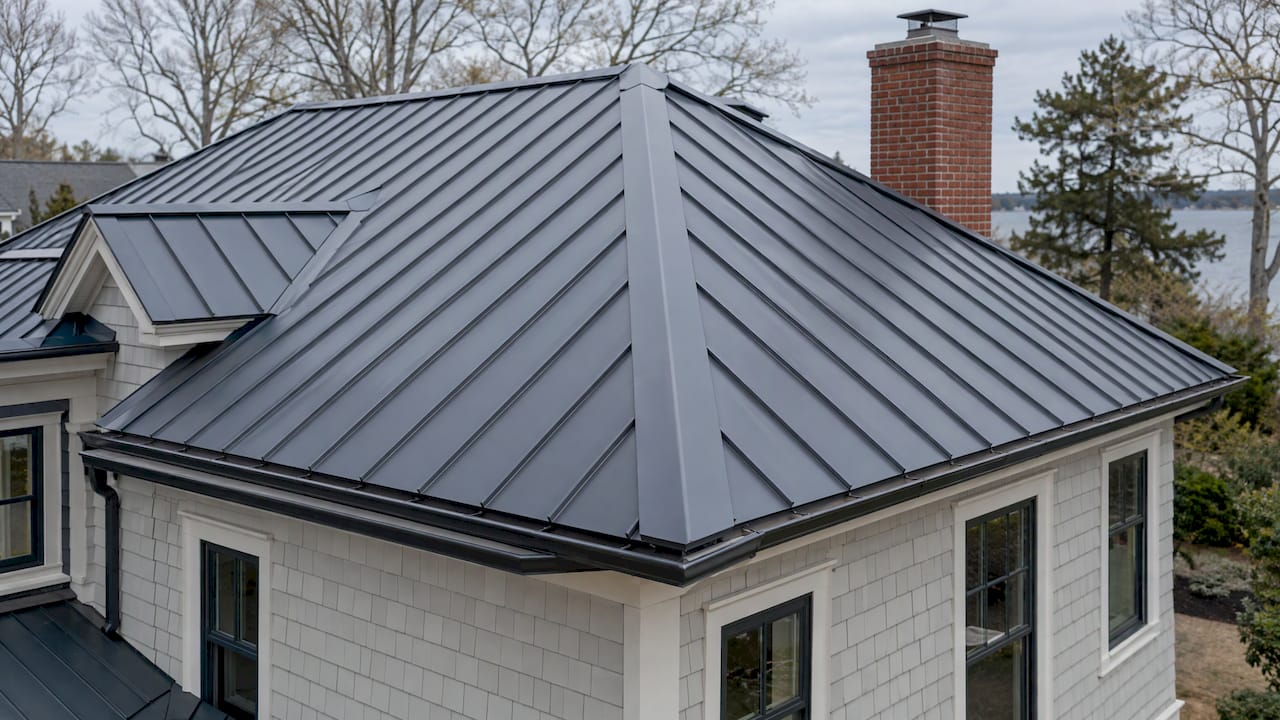
How to measure, order and install hip flashing on a standing seam roof: cleats, closures, rib terminations, peak caps and the mistakes that cause callbacks.
Hip flashing on a standing seam roof is a formed metal cap that covers the line where two sloping panel fields meet and sheds water down each plane. It is not a ridge cap turned on its side. The cap has to match the panel profile and pitch, hook onto cleats or closures instead of screwing through the panel faces, and sit over rib terminations that were cut and dressed correctly. If you order the cap with the panels, from the same takeoff, it fits the first time. We supply cut-and-drop standing seam panels and trim and flashing packages to contractors across Virginia, Maryland, Washington DC, Pennsylvania and West Virginia, so this guide is written for the crew that has to make the hip work.
TL;DR
- A hip cap bridges two panel fields, sits over closures that match the panel profile, and must allow for panel movement. A generic ridge cap rarely does this.
- The detail that decides whether a hip leaks is how the panel ribs end at the hip line, more than the cap itself.
- Standard sequence: membrane, cleats or closures, panels cut to the hip, ribs dressed closed, cap hooked and fastened, peak cap at the convergence, folded closure at the eave.
- Sealant supports correct flashing and closures. It never replaces them.
- Give your supplier the panel profile, gauge, pitch and hip lengths so panels and trim are cut to match.
Table of Contents
- What hip flashing does on a standing seam roof
- Why a ridge cap is not a hip cap
- Before you order: what to measure and confirm
- Installation sequence, step by step
- Where hip flashing fails
- A worked example: a four-hip residential roof
- Our view: order the hip with the roof, not after it
- Ordering hip trim and panels together
- Related details on the same roof
- FAQ
- Sources
What hip flashing does on a standing seam roof
A hip is the external angle where two roof planes slope away from each other, running from the ridge down to the eave. On a standing seam roof, each plane has panels running straight down the slope. At the hip, those panels are cut at an angle and stop. The cap goes over that cut edge, closing the gap and keeping rain, snow and wind-driven water out of the panel ends.
The cap has three jobs:
- Cover the intersection. It must be wide enough to hide the cut panel ends on both sides with a real margin.
- Shed water down each plane. Water that lands on the cap must run onto the panel flats below, not behind the cap.
- Let the roof move. Steel expands and contracts with temperature. A cap that locks the panels rigidly in place works against the clip system that lets a standing seam roof float.
A hip behaves like a ridge in many details, but it runs down the roof instead of across it. Water has gravity on its side at a ridge. At a hip, the cap is a sloped channel with panel ends along both edges, so closure fit and end treatment matter more. Installers should follow the drawing for the specific panel system rather than a generic cap shape, as one metal roofing guide puts it.
Why a ridge cap is not a hip cap
Product listings use “ridge cap” and “hip cap” loosely, and some systems use the same formed part for both. Others do not. Before you order, confirm which your panel system calls for. Three things go wrong when a standard cap is assumed to fit:
- Profile mismatch. A cap or closure shaped for a different rib height or seam leaves gaps at the panel ends.
- Pitch mismatch. A cap bent for a ridge angle will not sit tight on both planes at a hip, where the angle you measure on the roof differs from the pitch number on the plans.
- Attachment mismatch. An exposed-fastener cap can pin down panels that are meant to move, or give a poor connection to a concealed-clip system.
The same applies to the other flashings on the roof. If you are working on the full trim list, our guides on sidewall flashing for standing seam and fascia integration cover how those details tie into the roof edges where your hip caps terminate.
Before you order: what to measure and confirm
Hip trim is only as good as the information behind the order. Gather this before you call in a takeoff:
- Panel profile and system. Our two lines are the 1-inch mechanical lock and the 1.5-inch snap lock, both in 24-gauge and 26-gauge Englert steel. The rib height and seam shape drive the closure profile.
- Gauge and color. Cap, closures and panels should be coordinated. Matching the trim to the panel run is simpler when it comes from the same order.
- Roof pitch and hip angle. Measure on the roof where you can. Caps are bent to the angle that sits tight on both planes, and plan pitch alone can hide a framing variance.
- Length of each hip. Measure every hip separately. Do not assume a symmetrical hip roof has identical hips, because additions and cut-ins change them.
- Eave and ridge conditions. How does the hip end at the bottom, and where does it meet the ridge or the other hips? Complex intersections can need field templates or custom fabrication.
- Ventilation. If the roof has a ridge vent or a vented hip detail, say so, because that changes the closure and cap.
Send the numbers to our team along with your plans and we handle the takeoff for panels, trim and flashing together. Our trim and flashing page lists what the packages cover, and our panel specs page has the profile details to check against your drawings.
Installation sequence, step by step
Sequence matters more here than on a flat run of panels. Exact parts vary by system, so follow the drawings for your profile, and use this as the working order.
1. Lay the membrane along the hip
Run a self-adhered membrane the full length of the hip, centered on the hip line, before anything else goes down. It is the last line of defense if wind drives water under the cap. Where it goes wrong: stopping the membrane short of the eave, or laying it off-center so one side of the cut panels has no backup.
2. Set the cleats or closures
Fasten a cleat or offset closure along each side of the hip, set back from the center line. The cap will hook onto these rather than being screwed through the panel faces. One installation video from a trade publisher shows Z-closures set over butyl tape and fastened with pancake-head screws at 4 inches on center, with tube sealant on the closure ends next to the panel legs. Cut cleats to fit tightly between the panel locks. Where it goes wrong: closures skipped, or set on the wrong side of the line, which leaves open rib gaps for wind-driven water, pests and debris.
3. Cut the panels to the hip
Panels are cut at the hip angle so they stop short of the center line and the cap has a margin on each side. This is where a cut-to-length order helps. Panels that arrive cut to length with the right eave details need less field trimming. Our factory notched panels for eave hemming article explains how we handle the lower end of the panel run so the hip finishes cleanly at the eave.
4. Dress the cut rib closed
The cap cannot lie over a full-height rib, and a rib left square and open acts as a tube for water. Close the cut rib end with a hand seamer so it is dressed shut. This is the step that most often separates good hip work from bad. It is also the easiest to rush on a hot roof at the end of a day.
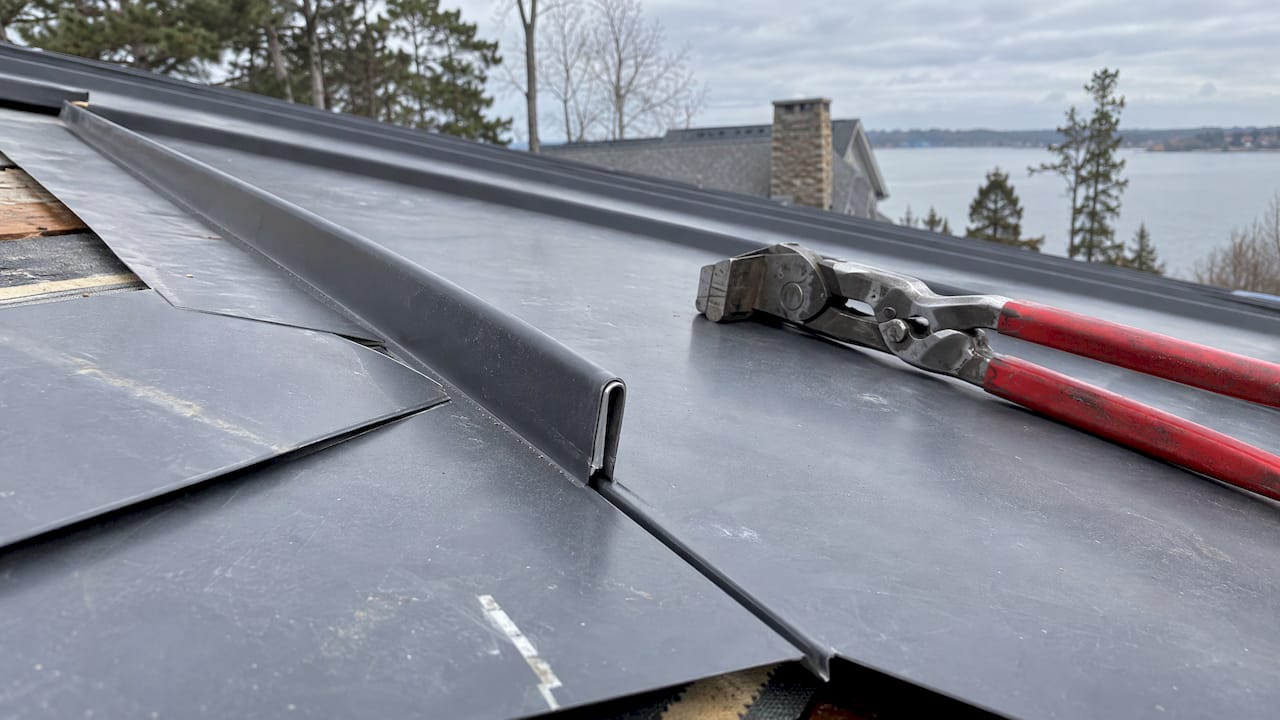
5. Hook and fasten the cap
Hook the cap hem onto the closures or cleats, then secure it. The same trade video fastens the hip trim with pop rivets at 18 inches on center after hooking it to the closures. Always use the fastener spec for your system. Keep fasteners out of the panel flats where they would pin the panel and add holes.
Lap each cap length uphill over downhill, with butyl compressed in the lap, so water running down the hip cannot get under the joint.
6. Close the peak
Where hips converge at the ridge, use a fabricated peak cap. Butting caps together and filling the joint with sealant is a short-term fix at the most exposed point of the roof. A peak cap sized to your hip and ridge angles is part of the trim order, not a field improvisation.
7. Finish the eave end
Terminate the bottom of the cap over the eave trim with a folded closure. An open end is a tube for wind-driven rain, snow and insects. Check the transition with the eave trim before the next crew covers it.
Where hip flashing fails
Most callbacks on hips trace to a short list of errors. A roofing contractor’s guide to caps lists mismatched profiles, misplaced closures, wrong fastener locations and excess sealant, and they match what shows up on the roof.
| Mistake | What happens | Fix |
|---|---|---|
| Cap profile does not match the panel | Gaps at panel ends, poor hook onto closures | Order trim by panel system and profile |
| Closures skipped or misplaced | Open rib gaps admit water, pests and debris | Closure at every rib termination along the hip |
| Cut rib left open | Water enters the panel end | Hand-seam the rib closed |
| Sealant used to fill gaps | Fails with movement and weather | Correct flashing and closures first, sealant as a supplement |
| Caps butted at the peak | Weak point where hips converge | Fabricated peak cap |
| Open cap end at the eave | Wind-driven water and insects get in | Folded closure over eave trim |
| Fasteners through panel faces | Holes, and panels cannot move | Hook to cleats, fasten at cap and closure laps |
One point to keep in mind: the cap is only one part of the water-management system. Underlayment, panel layout, closures, fasteners and the ridge and eave transitions all affect how the hip performs. A cap does not rescue panels that were installed badly.
A worked example: a four-hip residential roof
Take a hip roof with four hips of different lengths because a gable addition cuts into one slope. A takeoff that assumes four equal hips will leave the crew short on one side and long on another. A better order lists each hip by length and end condition, marks which end meets the ridge, and flags where hips converge so a peak cap is included. Add panel profile, gauge and color, and the trim arrives matched to the panels. On site, the crew spends its time on rib dressing and fastening instead of fabricating missing parts.
For roofs where the shop cannot be reached quickly, or the panels are too long to transport, our on-site roll forming service brings a roll former to the job so panels are formed to the length the hip layout needs.
Our view: order the hip with the roof, not after it
Hips are where a standing seam job shows whether the crew and the supplier talked before ordering. We see the hip as part of the panel system, not an add-on, and we think that is the right way to run a takeoff.
When a contractor sends us the plans, we want panel profile, gauge, pitch, every hip length and the end conditions on the same page. Our 1-inch mechanical lock and 1.5-inch snap lock panels in 24-gauge and 26-gauge Englert steel are made with coordinated trim and flashing packages in mind, so the cap, closures and panels come from one order and match.
Cut-and-drop delivery helps for the same reason. Panels cut to the length each plane needs arrive at the jobsite ready to set, which cuts waste and leaves the crew time for the details that keep a hip dry: the membrane, the closures, the hand-seamed ribs and the peak cap.
Our advice to any crew is to hang the hip detail on the manufacturer’s drawing, set the sequence before the first panel goes up, and get the trim list approved before the truck is booked.
Matt Catino
Ordering hip trim and panels together
If you are pricing a standing seam roof with hips, send us the plans and the roof dimensions. We prepare takeoffs for panels, trim and flashing, deliver cut-and-drop to your job site across Virginia, Maryland, Washington DC, Pennsylvania and West Virginia, and can bring on-site roll forming where the job calls for it.
Start with our contractor metal roofing supply page, or see how cut-and-drop delivery works. For completed jobs, our 24-gauge matte black snap lock project in Sperryville, VA shows a finished standing seam roof with its trim.
Related details on the same roof
The hip rarely stands alone. The same crew will be flashing other penetrations and transitions, and the logic is the same: match the trim to the panel system, hook instead of fastening through, and let sealant back up the metal rather than carry the detail. Our guides to chimney flashing, skylight flashing and shop fabricated curb flashing cover those details for standing seam.
As a pre-install check before you close in a hip:
- Membrane runs the full length, centered on the hip.
- Closures are in place at every rib termination.
- Every cut rib is hand-seamed closed.
- Cap laps run uphill over downhill, with butyl in the lap.
- Peak cap is on hand, not improvised.
- Eave end has a folded closure over the trim.
- Fasteners are located per the system drawing, not through panel flats.
FAQ
Is a hip cap the same as a ridge cap on a standing seam roof?
Not always. Some systems use one cap profile for both, and others require different parts. Product listings also use the terms loosely. Confirm against your panel system’s drawing before ordering, and give your supplier the pitch and hip angle.
Can I use sealant instead of closures at the hip?
No. Sealant is a supplement at laps and closure ends, and it does not replace correct flashing and closures. It also ages with movement and weather, so the metal detail has to carry the water.
How do I handle the point where hips meet at the ridge?
Use a fabricated peak cap sized to the hip and ridge angles. Butting caps and filling the joint with sealant leaves a weak point at the most exposed spot. Include the peak caps in the trim list when you place the order.
What should I send my supplier for a hip trim takeoff?
Send panel profile and gauge, color, roof pitch and hip angle, the length of each hip, the eave and ridge end conditions, and any ventilation requirement. With the plans, we can match the trim to the panel order.