Mansard Metal Roof Panels: Details, Layout and Ordering

How to panel a mansard roof in standing seam metal: slope zones, code minimums, slope-break and eave details, and what to confirm before you order.
Standing seam panels work on a mansard when you treat the roof as two roofs: a steep lower slope that reads like a wall, and a shallow upper slope that has to shed water like a low-slope roof. Get the panel lengths, the slope-break detail and the trim package right before the first sheet goes up, and the job goes fast. We supply custom-length 24-gauge and 26-gauge Englert standing seam panels, cut to your takeoff and dropped at the jobsite across Virginia, Maryland, Washington DC, Pennsylvania and West Virginia, which suits a mansard well because every face has a different run.
TL;DR
- A mansard has a steep lower slope (commonly cited at 60 to 80 degrees) and a flatter upper slope, so panel lengths, seam orientation and trim differ on each.
- Under the IBC, standing seam panel systems are listed down to 1/4:12, so the upper deck is rarely the code problem. Manufacturer minimums and substrate prep matter more.
- The slope break, the eave, the hips and the dormer cheeks are where leaks start. Order trim and flashing with the panels, not afterward.
- Short, repeated panel runs on four faces make exact cut lengths and a clean takeoff worth more than on a plain gable.
- Confirm gauge, finish, clip type and thermal movement allowance before you order, and check your jurisdiction’s adopted code edition.
Table of Contents
- What makes a mansard different from other roofs
- Which standing seam profile fits which section
- What the code says about slope
- Panel length and layout: the part that saves money
- Detailing the slope break
- Eaves, hips, ridge and dormers
- Installation sequence
- What to confirm before ordering
- Common mistakes on mansard re-roofs
- Our approach to mansard jobs
- Ordering mansard panels from us
- FAQ
- Sources
What makes a mansard different from other roofs
A mansard has a double slope on all four sides. The lower slope is steep, often described as 60 to 80 degrees, and the upper slope is much flatter, according to a roofing cost guide that breaks down mansard geometry. Add hips at every corner, and usually dormers cut through the steep face, and you have a roof that is mostly detail work.
For a contractor this changes three things.
- The lower slope is a wall in everything but name. Panels run short, the roof is visible from the street, and a crooked seam line shows. Appearance is the job.
- The upper slope is the real roof. It is often low enough that water sits longer, so seam type, substrate and sealant choices count.
- The break between them is a transition. Water coming off the steep face hits a shallow one at speed. That joint needs its own flashing, and it is where most callbacks begin.
Mansards are common on older commercial buildings, townhouses, hotels and renovated mixed-use buildings in the Mid-Atlantic, which is why many of these jobs are re-roofs over existing decking with tight access and occupied space below.
Which standing seam profile fits which section
Standing seam is a good match for both slopes because the fasteners are concealed and the seams run in clean vertical lines. On the steep lower face, those lines read as architectural ribs from the street. On the upper face, the raised seam keeps the water path clear of fasteners.
We offer two profiles, both in 24-gauge and 26-gauge steel:
| Profile | Seam height | Seaming | Typical use on a mansard |
|---|---|---|---|
| 1-inch mechanical lock | 1 inch | Mechanically seamed on site | Upper slopes and low-pitch decks where you want a locked seam |
| 1.5-inch snap lock | 1.5 inches | Snaps together | Steep faces and fast installs where the crew wants speed |
The choice usually follows the slope. A mechanical lock seam is closed with a seaming tool, which is the more deliberate path on the shallow upper deck. Snap lock goes together by hand pressure, which keeps a crew moving on tall, steep faces where every minute on a lift or scaffold costs money.
If you want one profile across the whole roof for visual continuity, that is a legitimate design choice. Match the seam height on both slopes and let the trim carry the transition. Our panel specs page lists the dimensions you need for layout.
Where ribbed panels come in
Exposed-fastener ribbed panels turn up on utilitarian mansards, such as back elevations or mechanical-screen walls on commercial buildings. They do not give the clean concealed-fastener look that a visible street-facing mansard usually calls for, so on architectural work standing seam is the standard answer.
What the code says about slope
The upper deck is where code minimums apply. A summary of IBC section 1507.4.2 sets these minimum slopes:
| Panel type | Minimum slope |
|---|---|
| Lapped, nonsoldered panels without lap sealant | 3:12 |
| Lapped, nonsoldered panels with lap sealant | 1/2:12 |
| Standing seam panel systems | 1/4:12 |
Most mansard upper decks run well above 1/4:12, so the code floor is rarely what limits you. What limits you is the manufacturer’s own requirement. A June 2025 code evaluation report for one steel panel product states compliance with IBC Section 1507.4 and requires a minimum 4:12 slope for that product. Different systems carry different minimums, so read the evaluation report for the exact panel you are ordering.
Two more points that catch crews out:
- Edition matters. The 2024 IBC defines low slope as less than 2 units vertical in 12 horizontal (17 percent), and a roof at exactly 2:12 is not low slope under that definition. Jurisdictions adopt new editions on their own schedules, so confirm which edition your building department enforces.
- Local amendments exist. Virginia, Maryland, DC, Pennsylvania and West Virginia each adopt and amend the model codes their own way.
We walk through the slope tiers and how contractors apply them in our IBC metal roofing checks article.
Panel length and layout: the part that saves money
On a gable, you order long panels and trim the waste at the ridge. On a mansard, you have four lower faces, four upper faces, hips, and dormer interruptions. Every panel run is different, and each panel often lands between 4 and 12 feet on the steep face and longer on the upper deck.
That is the case for cut-and-drop. With cut-and-drop delivery you give us the lengths from your takeoff and the panels arrive cut to size at the job. You are not cutting standard sheets on a lift and carrying drops back to the truck. See also how long standing seam panels can be if you are considering a single long run on the upper face.
A workable takeoff routine for a mansard:
- Measure each face separately. Do not assume the four sides are identical. Older buildings are rarely square.
- Measure from eave to slope break, and from slope break to the upper edge or ridge. Record both lengths per face.
- Add allowance for the hem, the eave drip and the break flashing. Panel length is not the measured slope length.
- Mark dormer locations. Panels beside a dormer are cut to different lengths per run, and the seam layout should be planned around the dormer cheek, not the other way around.
- Plan seam centers before ordering. Decide whether a seam lands on each hip or dormer centerline, and work out the starting point so the last panel on a face is not a sliver.
- Send the list as a cut schedule by face and panel number. Labeled bundles let the crew pick the panel for each spot without sorting.
Our team supports contractors with takeoff help on this kind of layout through our contractor supply program.
Detailing the slope break
The slope break is the single most important detail on the roof. Two approaches are common.
Panels break at the transition. The lower panel ends at the break and a formed break flashing (a bent metal trim piece) caps it. The upper panel begins above the flashing with its own hem or cleat. This is the simplest to build, and it lets you use different profiles or seam heights above and below. Water exits the lower face over the flashing and onto the upper deck, so the flashing must lap the upper panel correctly.

Panels bend over the break. A single continuous panel is field-bent at the transition. This gives a seamless look, but the bend has to be accurate and the panel has to be long enough to cover both slopes in one piece, which puts more weight on exact length.
Whichever method you choose, work through these questions:
- Does the flashing lap in the direction of water flow, with the upper piece over the lower?
- Is there a continuous cleat or clip line so the panel cannot lift in wind at the transition?
- Is the substrate continuous and solid across the break, with underlayment lapped correctly?
- Have you allowed for the panel to expand and contract without binding at the flashing?
Our trim and flashing packages are coordinated with the panels, so the break flashing, eave trim, hip and ridge pieces and the rest arrive matched to your order instead of coming from separate suppliers in separate finishes.
Eaves, hips, ridge and dormers
Eaves
The lower edge of a mansard often meets a cornice, gutter or a built-in box gutter, so water management at the eave needs a plan before you cut panels. Confirm the drip edge projection and where water will go. On the steep face, water leaves fast and can overshoot a standard gutter.
Hips
A mansard hip is a steep corner. Panels on each adjoining face are cut to meet at the hip line, and a formed hip cap covers the joint. Planning seam layout so panels on both faces end at a similar position keeps the hip cap tidy. A mitered cut is time-consuming in the field and leaves rough edges that show, which is another reason to specify exact lengths from the takeoff.
Ridge or upper edge
The upper deck terminates either at a ridge, a flat roof edge or a parapet. Each has its own flashing. If the upper deck meets a flat membrane roof, plan the transition so the membrane can be replaced later without disturbing the metal.
Dormers
Dormers on the steep face create valleys and cheek walls. Each has to be flashed with step or panel-edge flashing against the cheek, a head flashing above the dormer window or door, and a sill flashing below. Do not let a panel seam run directly into a dormer corner. Offset the layout so the seam falls to one side.
Penetrations and wall transitions
Vents and pipes on the upper deck need pipe boots or custom curbs sized to the seam spacing. Walls that rise above the mansard need counterflashing set into the wall. Any solar plans for the upper deck should be settled early too, since mounting hardware for metal roofs is chosen to fit the seam type.
Installation sequence
The general order that works on most mansards:
- Prepare the substrate. Solid, flat, dry decking. Fix any rot or irregularities before panels go on, because a steep face shows every wave.
- Install underlayment. Lap it in the direction of water flow, and use an underlayment rated for the heat the metal will transfer. Follow the panel manufacturer’s instructions for the specific product.
- Install eave trim and drip edge.
- Set a layout line. Square the first panel off a plumb line, not the eave, since old eaves are rarely level. A first panel that is off by a quarter inch will be off by an inch across a long face.
- Panel the lower slope. Work from a hip or from a fixed starting point, snapping or seaming as you go.
- Install the slope-break flashing.
- Panel the upper slope. Start from the break so seam lines align or are deliberately offset.
- Finish the hips, ridge, dormers and penetrations.
Thermal movement
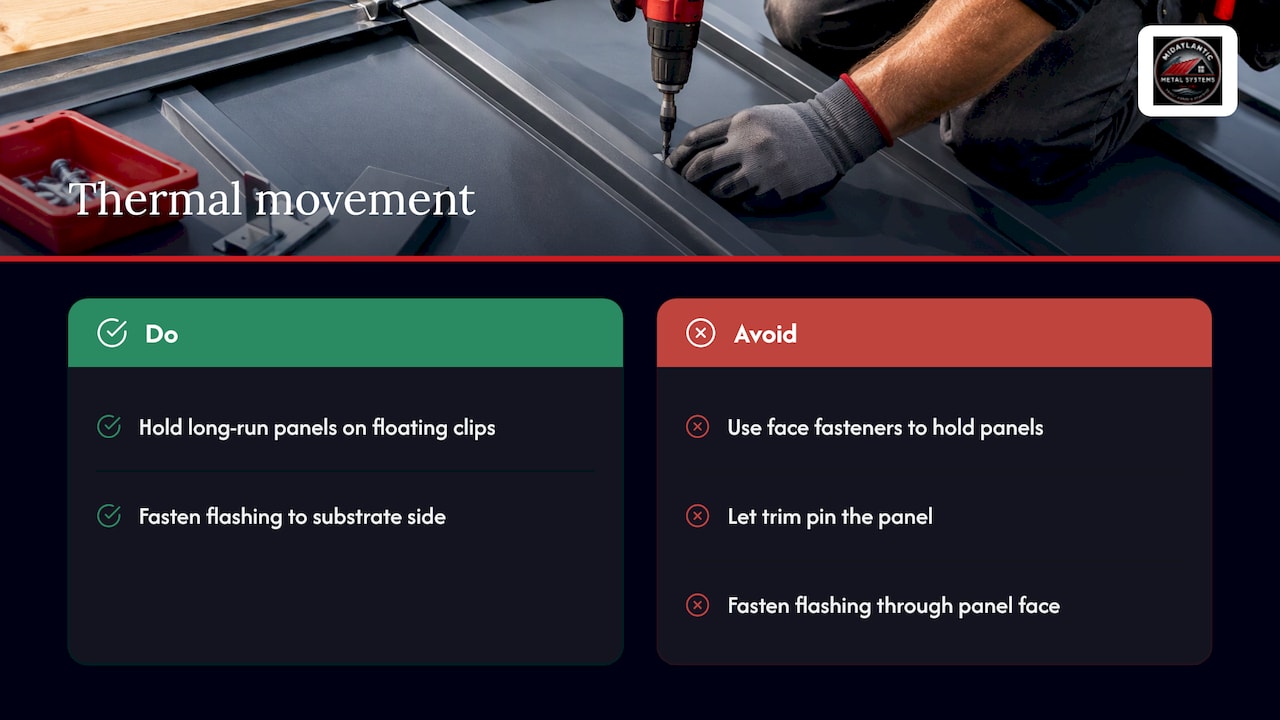
Steel expands and contracts with temperature. On long upper-deck runs the panels need to float on their clips, so clips, not face fasteners, hold the panel, and trim must not pin it. On short lower-slope runs, movement is small, but the slope-break flashing can still bind a panel if it is fastened through the panel face. Fasten flashing to the substrate side, not through the panel.
What to confirm before ordering
Send this list with your takeoff, and the order goes through cleanly:
- Gauge. 24-gauge is heavier and holds a flatter look across wide pans. 26-gauge is lighter and easier to handle on steep faces.
- Profile and seam height. 1-inch mechanical lock or 1.5-inch snap lock.
- Finish and color. Match to trim from the same package. Our project gallery shows 24-gauge matte black snap lock, and a 26-gauge forest green snap lock job in Virginia.
- Panel lengths by face. As in the cut schedule above.
- Clip type and fasteners. Match to substrate and the clip spacing the manufacturer requires.
- Trim list. Eave, break flashing, hips, ridge, dormer pieces, and wall transitions.
- Delivery access. Tight urban sites need a delivery window and a place to stage long bundles.
- Code edition and local requirements. As above.
Common mistakes on mansard re-roofs
- Reusing standard sheets and cutting in the field. Slow, wasteful, and ragged edges show on a steep face.
- Skipping a dedicated slope-break flashing. Water runs behind a lap that was never meant to take that velocity.
- Fastening through the panel face on the upper deck. It restricts movement and creates leak paths.
- Aligning to the eave. Old eaves are crooked, and the error grows up the face.
- Laying out seams without checking the dormers. Seam lines run into corners and the flashing has to be improvised.
- Ordering trim separately in another finish. Colors rarely match across suppliers and batches.
- Ignoring local code adoption. The edition in force sets the definitions your inspector uses.
Our approach to mansard jobs
On a mansard, the panels are the least complicated part of the job. The complication is that every face is different, and a crew that has to stop and re-measure loses the day.
That is why we build our service around the takeoff. We cut custom lengths to your schedule, send the trim and flashing with the panels, and deliver to the jobsite so the crew is working with finished material, not cutting stock on a lift. When access is hard or panels would be very long, our on-site roll forming gives you another way to get the exact lengths you need at the building.
We work with contractors across Virginia, Maryland, Washington DC, Pennsylvania and West Virginia, and we would rather talk through your slope-break detail before the order than after the first leak.
Matt Catino
Ordering mansard panels from us
If you have a mansard takeoff ready, send it to us. We make 1-inch mechanical lock and 1.5-inch snap lock standing seam panels in 24-gauge and 26-gauge Englert steel, cut to length and delivered to your jobsite, with matching trim and flashing. For awkward sites, on-site roll forming is also available.
Start with our contractor supply page or go straight to mid-atlantic standing seam panels to submit your list.
FAQ
Can you use standing seam metal on both the steep and flat sections of a mansard?
Yes. Standing seam suits both because its fasteners are concealed and its seams run in clean lines. Check the manufacturer’s slope requirement for the upper deck, and detail the slope break with its own flashing.
What is the minimum slope for standing seam on a mansard roof?
The IBC lists standing seam panel systems down to 1/4:12, but the manufacturer’s evaluation report for your product may require more. Your local building department decides which code edition applies.
How long should the panels be?
It depends on the face. Measure eave to slope break and slope break to the top edge separately, then add allowances for hems and flashing. Cut-and-drop lets you order each length exactly.
Do I need separate trim for the slope break?
Yes. A formed break flashing or a continuous bend is needed where the steep and shallow slopes meet. We include trim and flashing in the order so it matches the panels.
Sources
- Mansard Roof: Pros, Cons, Costs & Best Materials
- Metal Roof Panels, IBC 1507.4 summary (UpCodes)
- Code Evaluation Report, June 2025 (QAI)
- Code Changes Affecting the Building Enclosure in the 2024 IBC (IIBEC)
- How to Choose a Solar Mounting System for Metal Roofs