Rake Trim for Standing Seam Roofs: Detail and Install

How to detail, order and install rake trim on a standing seam metal roof: components, cleats, splices, eave and peak finishes, wind uplift and common mistakes.
Rake trim on a standing seam roof is the metal flashing that finishes the sloped gable edge. It covers or captures the cut panel ends, sheds water away from the roof assembly, and gives the edge its clean finished line. The right trim depends on the panel profile you are installing, so the detail starts with the system, not with a stock piece off the shelf. This guide covers what to order, how the detail goes together, and where crews usually get it wrong.
We supply cut-and-drop standing seam panels and matching trim to contractors across Virginia, Maryland, Washington DC, Pennsylvania and West Virginia. What follows is written for the crew leader, estimator or builder who has to get the gable edge right the first time.
TL;DR
- Rake trim (also called gable trim) runs along the sloped edge of the roof and covers or captures the exposed panel ends.
- Trim legs, hems and corner details are system-specific. Match the trim to the panel profile and the panel maker’s drawings, not to looks alone.
- The rake is a high-stress zone for wind. Clip spacing near the rake is typically tighter than in the field of the roof.
- Plan splices, overlap direction and eave and peak terminations before the trim package is ordered, and use sealant as a supplement, never as the connection.
- Ordering panels and trim together, cut to length, cuts waste and avoids mismatched components on site.
Table of Contents
- What rake trim does on a standing seam roof
- How the rake detail changes with the panel profile
- The parts of a rake detail
- Installing rake trim on a standing seam roof
- Wind uplift and the rake
- Finishing the rake at the eave, the peak and where pitches meet
- Fastening, splicing and sealing the trim
- Common rake trim mistakes
- Ordering the panels and trim together
- Get panels and matching trim on one order
- Our perspective on rake trim
- FAQ
- Sources
What rake trim does on a standing seam roof
A rake is the sloped edge of a roof where the roof plane stops at a gable wall or an open gable end. Eaves run level, rakes run up the slope. Rake trim is the flashing that goes on that sloped edge, and it does three jobs.
First, it covers or captures the exposed panel ends so that wind-driven rain cannot get under the panel edge. Second, it carries water off the roof and away from the fascia and the wall below. Third, it defines the look of the building. On a standing seam roof the gable edge is one of the most visible lines on the house, and a wavy or sawtoothed rake shows from the street.
On a gable you will also hear it called gable trim or gable flashing. Homeowners sometimes call it drip edge, and ordinary drip edge can be made to work on some profiles. But a rake trim made for the system gives you hems and legs designed to hold the edge of the panel, which is why the detail on a standing seam roof is more than a cosmetic choice.
How the rake detail changes with the panel profile
There is no single standing seam rake detail. The edge condition depends on how the panel is seamed and how the last panel terminates.
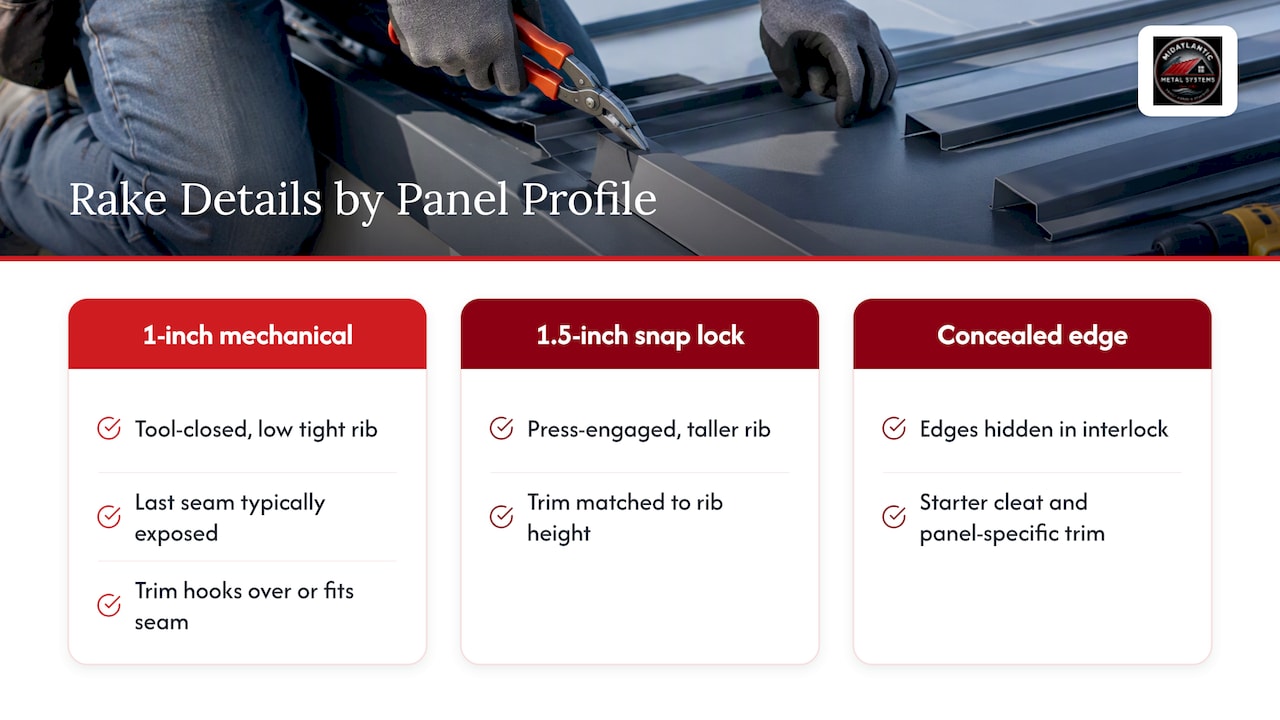
Mechanical lock panels (1-inch seam). The seam is closed with a seaming tool, which gives a low, tight rib. At the rake, the last seam is typically exposed on the edge, and the rake trim is designed to hook over or fit against it. Our 1-inch mechanical lock panels are typically used where a flatter, more architectural look is wanted.
Snap lock panels (1.5-inch seam). The seam engages when the panel is pressed onto the neighboring panel. The taller rib gives the rake trim more to work with, and the trim profile is matched to that rib height.
Systems that conceal the edge. Some seam designs hide all factory-cut edges inside the interlock, as in a Metal Construction Association case study of a Dutch seam roof. In that kind of system the rake is detailed around a starter cleat and a trim that fits that specific panel, not the way a field-cut panel would be handled.
The practical takeaway: trim lengths, leg dimensions, hems and corner details are system-specific, and rake trim that hooks over seams or seats into formed edges should be one the panel manufacturer has approved for that system. Check the drawings before you buy a lot of trim. Our panel specs page lists the profiles and gauges we run, 24-gauge and 26-gauge steel, so you can match trim to the panel on your takeoff.
The parts of a rake detail
A complete rake is a small assembly. Listing it out before ordering prevents the “we’re one piece short” call from the roof.
| Component | What it does | What to confirm |
|---|---|---|
| Rake trim (gable trim) | Covers or captures the panel edge and sheds water | Profile approved for your panel system, finish and gauge |
| Starter cleat or rake cleat | Holds the trim or the first panel edge mechanically | Compatibility with panel type and substrate |
| Panel clips | Hold the panels and resist uplift | Spacing near the rake, fastener type |
| Underlayment and edge treatment | Seals the deck edge beneath the metal | Overlap and lap direction at the perimeter |
| Eave and peak terminations | Close the trim at both ends | Cut angles, hems and corner pieces |
| Fasteners and sealant | Secure and supplement the connection | Fastener length, finish match, sealant type |
A trim package that is built with the panel order, rather than assembled from whatever the supplier has on hand, avoids mismatched pieces. Our trim package checklist walks through the four steps we suggest before a package is released, and our trim and flashing page shows what we can include with a panel order.
Installing rake trim on a standing seam roof
The order below is general. Your panel maker’s instructions win wherever they differ.
1. Check the roof geometry first
Start square. Before the first piece of metal goes on, measure the roof and check that the eave line and the rake are square to each other. If the building is out of square, adjust the drip edge at the eave to absorb it, so the panels do not walk and sawtooth along the eave. Fixing this at the start is much cheaper than hiding it at the rake later.
2. Seal the edge and set the underlayment
The perimeter is where underlayment gets cut, folded and lapped. SMACNA’s sheet-metal roof test report treats transitions and edge conditions as critical, calling for the underlayment to be sealed and the metal fitted tightly against the perimeter. Lap the underlayment so water that gets past the metal is directed out and down, not behind the fascia.
3. Set the starter or rake cleat where the system calls for one
Some systems start the rake with a continuous cleat. Others hook trim over the last seam. Follow the drawing for your panel. Keep the cleat straight, because the trim will follow every wobble in it.
4. Set the first panel
The first panel establishes the look of the whole roof. For a professional-grade job, the first panel is often trimmed in width with shears so the roof looks symmetrical, with the cut edge tucked into the rake trim. If you plan to do this, tell us when the order is placed. Custom-length and custom-width panels are the reason to order cut-and-drop delivery in the first place, and a factory-cut first panel is much easier to keep straight than one trimmed up on the roof.
5. Hang the rake trim
Trim goes on from the eave toward the peak or the reverse, depending on how you want the laps to face. Keep the overlap direction so that water flowing down the slope runs over the laps and not into them. Fasten the trim in the pattern the system calls for and keep the fasteners in a straight line. Rows of fasteners are visible from the ground.
6. Finish the ends
Cut and hem the trim at the eave and peak so the ends close the edge instead of leaving an open channel. More on this below.
Wind uplift and the rake
The rake is where wind gets under the roof. Fine Homebuilding notes that panels at the rake edges are among those most susceptible to wind uplift and need extra attention. The same article describes clips spaced typically at 1 ft. on center near the rakes, then 2 ft. on center across the rest of the roof.
Treat that as a general illustration and not as your spec. Actual clip spacing and fastener requirements come from the panel manufacturer’s tested assemblies and from your local code and design wind loads. That is a conversation for the engineer of record or the panel maker on any job with exposed sites, tall buildings or coastal wind zones. Our article on standing seam wind uplift covers what contractors should check before the roof goes on.
Finishing the rake at the eave, the peak and where pitches meet
This is where the trim either looks right or looks like a patch. The details below are how we think about it. As with everything above, your panel system’s drawings come first.
At the eave. The rake trim and the eave detail meet at a corner. Decide which piece laps over which before you cut, and make sure water from the rake cannot run behind the eave drip. Starting with a clean, square eave helps. Panels with a factory-notched, hemmed eave start make the corner much easier, and we cover that in our article on factory notched panels and eave hemming.
At the peak. Rake trim on opposite sides of a gable meets the ridge detail. Plan how the trim terminates under or into the ridge cap, so the end of the trim is covered rather than left as a visible cut. Mark the cut angle from the actual roof pitch, not from the drawing, since field pitches are not always exact.
Where two pitches meet. On a roof with a change of slope, such as a lower porch or a gambrel-style break, the rake trim has to change angle. Cut the trim at the break and lap the upper piece over the lower so water flows down and out. Do not bend a long continuous piece around the transition and hope it holds. A cut-and-lap joint is easier to keep watertight and easier to repair.

At a sidewall. Where the roof edge runs into a wall rather than ending at an open gable, the detail changes from rake trim to sidewall flashing. Our article on 26-gauge sidewall flashing covers that situation.
Fastening, splicing and sealing the trim
Long rakes need more than one piece of trim. That means splices, and splices are where leaks begin.
- Plan splice locations in advance. Put them where they can be lapped correctly, away from corners where possible, and lay out the pieces so you do not end up with a short sliver at the peak.
- Set the overlap direction. Laps should face away from the prevailing weather where practical and always shed water downslope.
- Allow for movement. Metal expands and contracts with temperature. Trim that is pinned rigid along a long run can buckle or pull fasteners. Where the system calls for slotted holes or expansion provisions, use them.
- Use sealant where it is called for, and only there. Sealant is often needed at specific transitions, but should not replace a designed mechanical connection. If a detail only works because of a bead of sealant, the detail is the problem.
For reference, SMACNA’s test specimens used edge flashing lapped 4 inches at the rake, continuous at the eave and ridge. Your manufacturer may specify a different lap, so use that as a reminder to check the number and not as a rule to copy.
Common rake trim mistakes
The same mistakes show up job after job. Most are cheap to avoid.
- Choosing trim by appearance. A piece that looks right but does not seat on the panel rib leaves the edge open. Appearance alone is a common reason for a poor rake.
- Ignoring panel movement. Long panels move. Trim that locks the panel edge rigidly can fight it.
- Overusing sealant. A thick bead hides a bad fit for a season or two and then fails.
- Forcing mismatched parts. If the trim, cleat and clip are from different systems and you have to bend things to make them meet, stop and reorder.
- Skipping the square check. An out-of-square roof shows up as a sawtooth at the eave and a wandering line at the rake.
- Ordering trim last. If the trim is a separate order, arriving after the panels, the crew stands around or improvises. Order the package with the panels.
Ordering the panels and trim together
Because the rake detail depends on the panel, the simplest way to avoid mismatch is to buy both from the same source and spec them on the same takeoff.
We make 1-inch mechanical lock and 1.5-inch snap lock standing seam panels in 24-gauge and 26-gauge steel on Englert metal systems, cut to the length you need and delivered to the job site. We also supply coordinated trim and flashing packages, and can roll panels on site for jobs where long runs or tight access make delivery of finished lengths difficult. Questions about how long a panel can be and still ship are answered on our page about how long standing seam panels can be.
If you want to see the finished result, look at our 24-gauge matte black snap lock project in Sperryville, VA, where the gable edges are a big part of the look.
Get panels and matching trim on one order
We work directly with roofing contractors, builders and general contractors. Send us your takeoff, including rake lengths, pitches and any pitch changes, and we will help you put together panels and a trim package that fit together before they reach the job site. Start at our contractor supply page.

If the job needs panels rolled on the roof instead, see on-site roll forming.
Our perspective on rake trim
Most callbacks on a standing seam roof do not start in the field of the roof. They start at the edges: the rake, the eave, the transitions. That is why we treat trim as part of the panel order and not an afterthought.
Our approach is to make the roof arrive ready to install. We cut panels to length for the job, so crews are not trimming and wasting material on the roof, and we coordinate the trim and flashing package with the panel profile, so the rake trim you receive is meant for the panels you receive.
We would rather answer questions about leg dimensions and hems before the order than after the truck is unloaded. If your detail is unusual, such as two pitches, a long rake or a tight schedule, tell us early and we will work through it with you.
Matt Catino
FAQ
Is rake trim the same as drip edge?
Not exactly. Drip edge is a general edge flashing, and on some roofs it can be used at the rake. Rake trim made for a standing seam system has hems and legs designed to cover or hold the panel edge, so it usually gives a more finished and more secure result.
Do I need a starter cleat for rake trim?
It depends on the panel system. Some details hook the trim over the last seam or into a formed panel edge, and others use a continuous cleat. Follow the manufacturer’s drawings for your profile, and confirm that the trim is approved for that system.
How should I fasten rake trim without hurting the seams?
Fasten the trim the way the system’s detail shows, keeping fasteners in a straight line and never through the standing rib unless the detail allows it. Plan for panel movement, and treat sealant as a supplement to the mechanical connection, not a replacement.
Can I order trim cut to match custom-length panels?
Yes. We build trim and flashing packages alongside custom-length panels, so ask for the trim to be quoted with the panel takeoff. Send the rake lengths and pitches so the package can be matched to the roof.
Sources
- Standing-Seam Roof, Fine Homebuilding
- Sheet Metal Roof Test Report, SMACNA
- Aluminum Dutch Seam Metal Roofing on Long Island Shore Home, Metal Construction Association
- Standing Seam Rake Trim: Installation, Components, and Best Practices, Rescreening Masters