Shop Fabricated Curb Flashing for Standing Seam Contractors, 18ga Spec
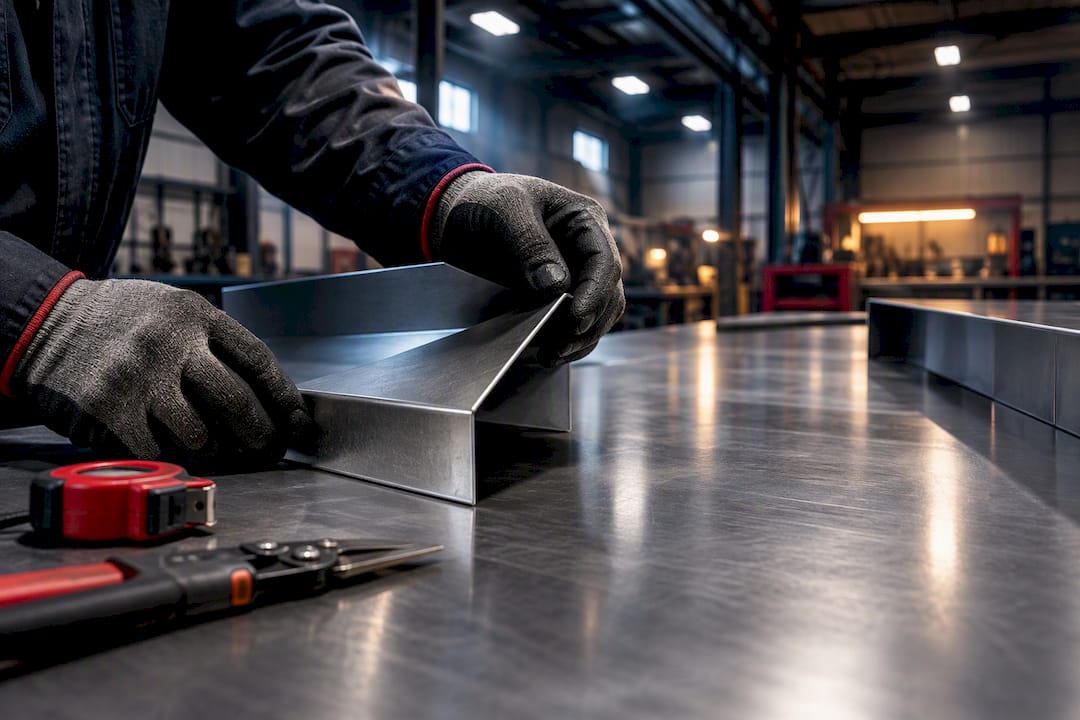
Shop fabrication how‑to for contractors installing curb flashing on standing seam roofs. Covers .080 inch aluminum or 18ga stainless, 12 in clearances,...
The over/under, or shingled, curb configuration is the standard method for a watertight curb on a standing seam roof, built with .080 inch aluminum or 18 gauge stainless steel, set with at least 12 inches of upslope clearance and 6 inches on the sides, and standing at a nominal 14 inches tall. Shop fabrication and early coordination with your panel supplier keep the detail consistent and protect the manufacturer’s warranty.
TL;DR:
- Proper clearances, with at least 12 inches upslope and 6 inches on the sides, are critical to prevent water backup and seam submersion during heavy rain.
- Shop-fabricated flashings are preferred for tighter fits and guaranteed tolerances, but field fitting can be used for last-minute adjustments with extra sealant redundancy.
- The over/under flashing configuration is essential for water drainage, with the downsloped edge alwayslapping forward and the upslope edge tucked underneath the panel above.
- Coordinating curb dimensions, layout, and ease of installation with the panel supplier and mechanical contractor before roof deck closure prevents leaks and rework.
Table of Contents
- What is a roof curb and which type fits standing seam panels
- Material recommendations, gauges, and nailer specifications
- How to flash a curb so water never backs up
- Installation sequence contractors can follow on site
- Getting the clearances and curb dimensions right
- When to specify shop-fabricated flashing versus field fitting
- Common curb failures and how to fix them
- Where this guidance comes from and how we can help
- Why speed and shop quality both have a place on a curb job
- Get curb flashing done right on your next standing seam job
- Sources
- FAQ
What is a roof curb and which type fits standing seam panels
A flashing curb is a thin metal frame that seals a roof penetration, while a structural curb carries the actual load of a rooftop unit and ties into framing below. Heavier equipment often calls for a double curb assembly: a structural curb for support paired with a separate flashing curb for weatherproofing, a setup the Metal Construction Association recommends where loads or differential movement demand it. On standing seam roofs, a rib-to-rib curb, sized to land its walls between panel ribs, is the preferred layout because it keeps fasteners out of the flat pan.
- A flashing curb seals the roof; a structural curb supports equipment weight.
- Double curbs separate structural support from waterproofing on heavier installations.
- The curb top must sit level, and it needs a wood nailer for fastening the roof flashing.
Material recommendations, gauges, and nailer specifications
Specify .080 inch aluminum or 18 gauge stainless steel curbs rather than Galvalume or galvanized steel, since welded seams on those coated substrates corrode faster over time than a solid, non-reactive metal. Match the curb finish to the panel material where possible, and call for stainless fasteners when mixing metals to avoid galvanic reaction at the joint. Curbs should carry a nailer with at least a 3.5 inch top surface for fastening, and treated lumber needs a compatibility check before it goes anywhere near the roofing membrane.
- Curb material: .080 inch aluminum or 18 gauge stainless steel, never bare Galvalume or galvanized at welds.
- Nailer: minimum 3.5 inch top surface, non-reactive blocking preferred over oil-borne treated lumber.
- Curb height: nominal 14 inches minimum, more where drainage or isolation requires it.
Recommendation: long-term curb performance depends on material choice, since welded Galvalume or galvanized areas are more prone to corrosion and weld failure than aluminum or stainless. That single spec line on a purchase order prevents most of the callback issues that show up two or three winters into a job.
Oil-borne preservatives in treated lumber can act as a solvent on roofing materials and cause bitumen to bleed through, so verify nailer compatibility before it ships to the site.
How to flash a curb so water never backs up
The over/under configuration is the detail that actually keeps a standing seam curb dry: the downslope edge of the flashing laps over the panel below it, while the upslope edge tucks under the panel above, so water always sheds forward instead of pooling behind a seam.
- Set the apron or base flashing first, extending it under the upslope panel far enough to clear the seam and prevent capillary backup.
- Install a counterflashing receiver around the curb perimeter, adding a counterflashing skirt whenever the flange extension is short.
- Run the side walls rib to rib so fasteners land in the raised seam rather than in the flat pan, cutting the number of exposed penetrations.
- Extend ice and water shield membrane under the flashing in cold climates or wherever snow load is a factor.
- Seal critical laps with tube grade butyl rather than a caulk gun bead, since butyl stays flexible through thermal cycling.
Pro Tip: Dry-fit the flashing pieces on the ground before final fastening, checking the over/under lap under panel simulation so the shingle direction is confirmed before anything gets sealed.
Installation sequence contractors can follow on site
Before cutting anything, confirm the rooftop unit’s footprint, pull panel dimensions from the bill of materials, and lay out the curb location so both upslope and side clearances fit without forcing a panel seam into the curb wall.
- Assemble the curb and flashing components on the ground, checking squareness and nailer height before it goes up.
- Set the structural curb on the roof deck, fastening to framing and confirming the top is level in both directions.
- Integrate the standing seam panels around the curb, running the upslope panel underneath the flashing and the downslope panel over it.
- Install the counterflashing last, once panels and base flashing are locked in place.
- Fasten in panel ribs wherever possible instead of the flat pan, following the fastener spacing called out on the shop drawing.
Once the flashing is sealed, run a hose test or wait for the first rain before the mechanical contractor sets and seals the rooftop unit itself. A level top surface matters more than most crews think: even a slight tilt concentrates water at one corner of the curb and defeats the shingle effect the whole detail depends on.
Pro Tip: Keep a printed clearance diagram on site during layout, since a curb positioned even a few inches off can force a panel seam right where a rib needs to sit.
Getting the clearances and curb dimensions right
Undersized clearances are the most common reason a curb detail fails, and the numbers are not negotiable on a properly detailed roof. Upslope clearance between the panel end and the curb diverter should run at least 12 inches, and side clearance between panel ribs and the curb wall should run at least 6 inches, with wider curbs needing more room on both dimensions.
- Upslope clearance: minimum 12 inches from panel end to curb diverter.
- Side clearance: minimum 6 inches from panel ribs to curb wall.
- Apron or underlap extension: at least 12 inches under the upper panel per standard panel-penetration guidance.
- Curb height: nominal 14 inches, taller where drains, traps, or seismic isolation require it.
Recommendation: a well-designed curb keeps these minimum clearances to avoid head pressure and seam submersion during heavy rain, a detail that matters even more on low-slope sections where water sits longer before it drains.
When to specify shop-fabricated flashing versus field fitting
SMACNA’s Architectural Sheet Metal Manual favors shop fabrication for flashing components because factory tolerances produce a tighter, more consistent fit than a field-cut piece, and that consistency matters most where the flashing has to interlock with a standing seam profile. Order profile-matched flashings, counterflashing receivers, and pre-formed transition pieces directly from your panel supplier whenever the panel profile is known ahead of time.
- Shop fabrication: preferred for curb flashing, counterflashing receivers, and transition pieces tied to a specific panel profile.
- Field fabrication or on-site roll forming: reserved for last-minute adjustments or dimensions that shift after the curb is set.
- Purchase orders: specify factory tolerances and panel profile so the flashing arrives ready to install.
Common curb failures and how to fix them
Most curb leaks trace back to one of a handful of repeat mistakes, and each has a known fix.
- Short upslope flange: rebuild the flange or add a diverter and increase clearance to the recommended 12 inches.
- Corroded welds on Galvalume or galvanized curbs: replace with .080 inch aluminum or 18 gauge stainless where the curb needs to last the life of the roof.
- Fasteners in panel flats: relocate fasteners into the ribs or retrofit a rib-to-rib curb detail, and check torque on existing screws.
- Retrofit fixes for an already-leaking curb: add a secondary counterflashing receiver, use a butyl tape remedy at the lap, or build a cricket where ponding collects upslope.
Pro Tip: A cricket costs far less to add during a retrofit than the drywall and insulation damage that a slow curb leak causes over a full season.
Where this guidance comes from and how we can help
This guide draws on Metal Construction Association best practices, SMACNA shop-fabrication standards, and field lessons documented by the Metal Building Contractors and Erectors Association. MidAtlantic Metal Systems supports contractors on these details with cut-and-drop panel delivery, on-site roll forming, and matched trim and flashing packages built for standing seam profiles. Always confirm curb flashing details with your panel manufacturer before installation to keep the roof warranty intact.
Why speed and shop quality both have a place on a curb job
Field-fit compromises make sense under real schedule pressure, but they raise leak risk unless the crew adds extra sealant redundancy at every lap. Shop-fabricated flashing costs a little more upfront and saves the rework later. Coordinate the panel supplier, curb fabricator, and mechanical contractor before the roof deck closes in, not after.
— Matt Catino
Get curb flashing done right on your next standing seam job
MidAtlantic Metal Systems supplies 1 inch mechanical lock and 1.5 inch snap lock standing seam panels, cut-and-drop delivery, on-site roll forming, and custom trim and flashing built to match your curb layout before the panels ever leave the shop.
Send us your rooftop unit locations and panel run lengths, and we will build a cut-and-drop quote around the clearances your curb actually needs. Request a takeoff through our standing seam panel page and get panels delivered ready for the crew to set.
Sources
- Selection and installation of curbs — Metal Construction Association
- SMACNA Architectural Sheet Metal Manual (2012) — ANSI Webstore
- Choosing the Right Roof Curb — LMCurbs
FAQ
How do I flash a roof curb on a standing seam roof?
Use the over/under configuration: the upslope panel tucks under the flashing while the downslope panel laps over it, so water always sheds forward. Add counterflashing around the perimeter and extend ice and water shield underneath in cold or snow-prone regions.
What are the downsides of a standing seam roof for curb work?
Standing seam panels require rib-aligned curb walls and careful clearance planning, since a curb placed too close to a seam can force fasteners into the flat pan or break the shingle lap. These issues are avoidable with correct layout, but they add coordination steps that a flat built-up roof does not need.
Who typically installs roof curbs on a metal roof?
Roofing contractors typically install the structural curb and flashing, while the mechanical contractor sets and seals the rooftop unit once the curb and flashing are watertight. Coordination between the two trades before the roof deck closes prevents mismatched clearances and sealing gaps.
Can I install a skylight on a standing seam roof using a curb?
Yes, a curb-mounted skylight follows the same over/under flashing logic as any other roof penetration, with the same minimum 12 inch upslope and 6 inch side clearances applying. The curb should still use aluminum or stainless steel rather than galvanized material to avoid weld corrosion over time.