Factory Notched Panels Cut Eave Hemming for Standing Seam Contractors
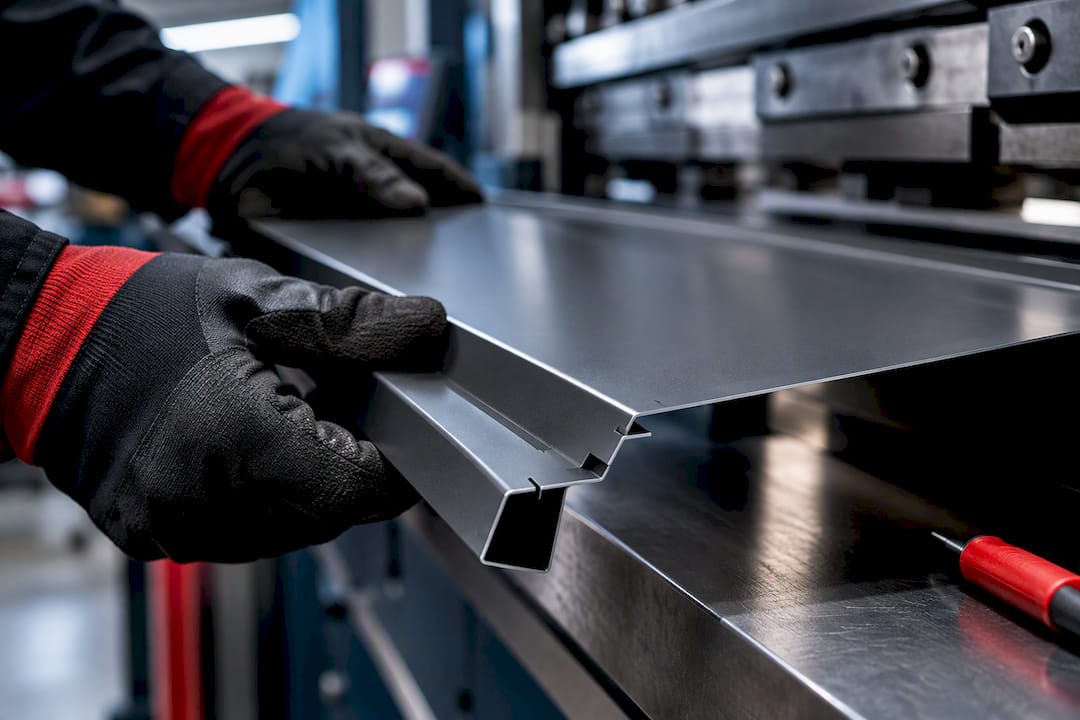
Contractor focused eave starter how to for standing seam roofs. Use factory notched panels, matched starters, and correct layout to cut field hemming and...
Install a matched hook/hem eave starter, engage a full 180° hem (factory-notched whenever possible), square the first panel before you set anything, then seam as you go. Match the starter profile to the panel leg and clip geometry exactly. Watch thermal movement at long runs and confirm clip compatibility before you fasten a single screw, because a mismatched clip or an unsquared start will show up in a leak months later.
TL;DR:
- Using factory-notched panels and matching trim profiles reduces errors and speeds installation, especially on long or complex runs.
- Confirm clip compatibility and perform dry-fit tests before fastening panels to avoid leaks, sealant failure, or seam damage.
- Proper layout with square lines and fixed reference points prevents panel drift and alignment issues over the length of the roof.
- Ensure the starter and panel profiles match exactly, as even a quarter-inch mismatch can cause hem engagement problems.
- Ordering custom or matched packages from the manufacturer minimizes onsite corrections, lowering overall project costs and warranty risks.
Table of Contents
- Pre-job checklist: starter trim types, hem tools, fasteners, and sealants
- How to verify starter, panel, and clip compatibility before you fasten anything
- Layout: chalk lines, 3-4-5 squaring, offsets, and planning for long panels
- Field procedure: install starter flashing, hem panels, engage seams, fasten clips, and seam correctly
- Identify, diagnose, and correct the usual installation problems at the eave
- Contractor-tested notes from MidAtlantic Metal Systems and author attribution
- Why factory precision beats field improvisation at the eave
- How MidAtlantic Metal Systems can help with your next eave detail
- Sources
- FAQ
Pre-job checklist: starter trim types, hem tools, fasteners, and sealants
Most eave starter problems trace back to the truck, not the roof. A crew that shows up with the wrong profile, no hemming tool, or the wrong sealant loses a day fixing what should have taken an hour.
Two starter types cover almost every standing seam job. A modified D, or hook eave, detail requires the panel to be hemmed fully so the hem hooks into the starter’s return leg. A fixed eave detail, by contrast, lets the panel end sit over the starter without a hem, typically extending about an inch past the eave edge. The Residential Standing Seam Install Manual treats the hook detail as the standard for a hydrostatic eave condition, and it specifically calls for panels to be pre-notched when that 180° hem is required so the hem doesn’t interfere with the seam geometry.
Factory notching beats field notching on speed and precision. A factory-notched panel arrives ready for the hemming tool, while a field-notched panel depends on the installer’s eye and a pair of snips, which is where inconsistent hems and torn coating start.
You’ll need:
- A hand hemming tool or bar folder to close the 180° hem cleanly.
- Duckbill pliers for tight spots and final hem seating near clip locations.
- A hand crimper for pre-seaming work at clip points before mechanical seaming.
- Butyl tape (typically applied about 2 inches up from the eave) and a compatible lap sealant for joints.
- Starter fasteners set at typical spacing intervals recommended by the manufacturer, commonly about two feet on center, unless the manufacturer detail specifies otherwise.
- A chalk box, tape measure, and squaring tools for layout.
- Standard fall protection and cut-resistant gloves for handling fresh sheet metal edges.
Before the truck leaves the yard, confirm the parts checklist matches the ordered trim package: starter profile, matching clips, fasteners, sealant tape, and any transition or endwall pieces for the same job.
Pro Tip: Order starter trim and panels from the same profile family whenever you can. A quarter-inch mismatch in leg height is invisible until the hem won’t seat, and by then the crew is already on the roof.
How to verify starter, panel, and clip compatibility before you fasten anything
Starter trim has to follow the panel’s leg and seam geometry, not the other way around. A snap-lock panel and a mechanically seamed panel use different leg heights, different seam closures, and often different clip designs, so a starter built for one rarely fits the other without modification.
Clips are where compatibility problems hide longest. According to educational materials on standing seam roof clips, clips must be proportioned to the panel’s seam geometry and sized to allow for thermal movement, and clip interchangeability across panel systems is not recommended without an engineering evaluation. A clip that doesn’t seat correctly at the eave can break sealant continuity inside the seam and reduce the assembly’s wind-uplift performance. The same source points installers to ASTM E1592 for uplift testing and to Factory Mutual FM4471 as a referenced standard for clip and panel assembly performance, and manufacturer test data should back up any substitution.
Before fastening anything, run a dry-fit test:
- Hem a sample panel end and check that it engages the starter hook fully, with no gap or forced spring-back.
- Check clip clearance at the first several clip locations for interference with the hemmed edge.
- Confirm your seamer head matches the panel profile; a seamer set up for the wrong seam height will chew the finish or fail to close the seam.
- Verify the starter’s fastener flange lines up with your layout marks before you commit sealant.
When the profiles don’t match out of the box, factory-matched trim or factory-notched panels from the same supplier remove the guesswork. Custom conditions, like a curved eave or a transition to a different panel type, are the exception where field engineering and OEM input are worth the extra time.
Layout: chalk lines, 3-4-5 squaring, offsets, and planning for long panels
A roof that starts crooked stays crooked. Every panel after the first one inherits whatever error you build into the layout, and by the far end of a long run that error can be inches wide.
- Snap a chalk line roughly 1 foot up from the eave, parallel to the fascia, as the reference for the starter and the first panel edge, per the installation manual.
- Square that line to the roof edge using a 3-4-5 triangle, or a scaled multiple such as 9-12-15 on a wider roof, rather than trusting the fascia to be square.
- Set a starting offset of about half an inch from the gable or first rake edge so the panel’s female or male leg sits exactly where you intend it.
- Align the panel’s leading leg against the chalk line and mark clip locations and panel end points before you hem or set the first panel.
- On longer panels, plan a single fixed point, typically near the ridge, and let the lower end float to accommodate thermal movement. The install manual notes that crews commonly place drag screws near that fixed point and let the eave detail move, which keeps thermal stress off the hem engagement at the bottom of the run.
Before the starter flashing or the first panel goes down, walk the line one more time: check the chalk line is still square, confirm the offset mark, and verify clip layout matches the ordered spacing. That five-minute check is cheaper than pulling panels back up later.
Field procedure: install starter flashing, hem panels, engage seams, fasten clips, and seam correctly
Once layout is confirmed, the sequence from starter flashing to finished seam follows a consistent order. Skipping steps, especially the hand-crimp step, is where most callbacks start.
- Set the starter flashing first. Lap adjoining starter pieces a minimum of 3 inches, run butyl tape at roughly 2 inches up from the eave per the install manual, and fasten the starter at about 24 inches on center unless the manufacturer detail calls for tighter spacing.
- Prep the panel hem. With a factory-notched panel, run the hem tool along the eave edge and close it toward 180°, leaving it slightly open until it seats in the starter hook, then close it the rest of the way. Field-notched panels need the notch cut cleanly first, matched to the same dimension, before hemming, and the install manual is blunt that field notching is more error-prone than ordering panels pre-notched.
- Seat the hem into the starter. Slide the hemmed edge into the hook detail and work it down the run, checking that it’s fully engaged with no visible gap before moving to the next panel.
- Attach clips and fasten drag or fixed points. Set clips at their specified spacing, and before mechanical seaming, hand-crimp the seam at each clip location. The roof seaming best practices guide treats hand-crimping at clip points as standard practice: it prepares the seam so the mechanical seamer needs less force to close it and it reduces the chance of read-through or a weak spot at the clip.
- Seam as you go. Run the seamer immediately behind the panel-setting crew rather than waiting until the whole roof is laid out. The same guide recommends checking the first 12 inches of any seamed length right after starting, confirming the seamer is calibrated to the panel’s gauge and profile before continuing down the run.
- Confirm hydrostatic shingling. Every lap, starter to panel and panel to panel, should be shingled so water always runs over a joint rather than into it. Guidance on hydrostatic low-slope roofing sets typical clearances of 12 inches upslope from panel ends to any diverter and 6 inches between panel seams and curb sides, and those same clearance habits apply to eave and penetration details generally.
- Inspect before you leave. Walk the finished eave and check seam closure, hem engagement, and sealant squeeze-out at laps. Look for read-through (a visible ripple where the clip sits under the seam) and correct it before it becomes a warranty call.
On air-leakage-controlled projects, tape the eave strut and seal any unused punched holes before the starter goes on. MBMA guidance on whole-building air leakage treats eave strut continuity as part of the building’s air barrier, and it’s far easier to tape before the trim covers it than after.
Pro Tip: Test your seamer on a scrap piece of the same gauge and profile before it ever touches the roof. A seamer calibrated for a different panel will either under-close the seam or crush the finish, and you won’t notice until the whole run is done.

Identify, diagnose, and correct the usual installation problems at the eave
Most eave failures come down to a short list of causes, and the installation manual traces nearly all of them back to one of three things: a starter or profile mismatch, an unsquared starting layout, or inattention to clip fit and thermal movement. That single fact narrows troubleshooting considerably.
- Panel drift: if panels are running out of parallel by the far end of the roof, go back to the layout. A starting line that wasn’t truly squared with the 3-4-5 method will compound error across every panel.
- Hem won’t seat: an under-hemmed panel needs another light pass with the hemming tool; an over-hemmed one that’s crushed the return leg usually has to be cut back and re-notched rather than forced.
- Clip misfit or read-through: if a clip doesn’t sit flush under the seam, stop and check whether it’s the specified clip for that panel profile. Substituted clips are flagged in clip guidance as something that shouldn’t happen without engineering review.
- Water at the eave: trace it to the nearest lap upslope. Insufficient shingling or a skipped run of butyl tape is the usual culprit, and the fix is to lift the panel, clean the surface, and reset the sealant rather than caulking over the symptom.
- When to stop and call someone: if a clip substitution, a structural question, or a warranty-relevant deviation comes up mid-job, pause and get design or manufacturer input before you seam over the problem.
Contractor-tested notes from MidAtlantic Metal Systems and author attribution
Field hemming is where a lot of installation time disappears, and it’s also where most hem-related callbacks start. Panels ordered pre-notched and cut to the exact eave length arrive ready for the hemming tool, which cuts out the guesswork of matching a field notch to a starter hook by eye.
Matched trim packages ensure the starter profile, panel leg, and clip spacing are specified together rather than assembled from whatever is in stock. Cut-and-drop delivery brings panels to the site pre-cut to length, and on-site roll forming covers jobs where access or run length makes standard delivery impractical, both aimed at getting a correctly profiled panel to the eave with less field correction.
Ordering a matched package can reduce total installed costs compared to paying a crew to rework field-notched hems or chase a leak back to a bad lap.
A few procedural notes for crews requesting matched starters:
- Confirm the panel profile (1-inch mechanical lock or 1.5-inch snap lock) and gauge before ordering trim, since starter geometry follows the panel leg.
- Ask for factory-notched panels when the job uses a hook eave detail, and specify the hem requirement at order time, not after delivery.
- Build in lead time for custom trim runs, especially on jobs with nonstandard eave conditions.
This article is written by Matt Catino, drawing on MidAtlantic Metal Systems’ work supplying custom standing seam panels and trim packages to contractors across the Mid-Atlantic.
Why factory precision beats field improvisation at the eave
The advice that gets repeated most on standing seam job sites, seal everything twice and hope the hem holds, treats the eave as a caulking problem. It isn’t. The eave is a geometry problem first, and every failure mode in this article, drift, read-through, leaks, starts with a mismatch between what the starter expects and what the panel or clip actually delivers.
The industry’s real blind spot is field notching. It’s treated as a normal part of the job when it’s actually the single easiest error to eliminate by ordering differently. A pre-notched panel removes an entire category of mistake before the crew ever picks up a tool.
If you take one thing from this: fix compatibility and layout before you touch a hemming tool. Sealant and fasteners matter, but they’re the last five percent of the job, not the first. Get the profile match and the squared starting line right, and the rest of the installation stops fighting you.
— Matt Catino
How MidAtlantic Metal Systems can help with your next eave detail
A matched starter package removes most of the guesswork this article covers. Trim and flashing can be built to match the panel profile ordered, so the hook eave, clip spacing, and hem geometry are specified together instead of pieced together on site.
For contractors who want to cut field hemming out of the schedule entirely, factory-notched panels ordered through our cut-and-drop delivery service arrive pre-cut and ready for the hemming tool. Jobs with tight access or unusually long runs are a fit for on-site standing seam roll forming, where panels are formed at the jobsite to the exact length the roof needs.
If your next job needs a starter profile that actually matches your panel and clip spacing, start with our trim and flashing page and request a matched package before you order panels. Getting the profiles right before delivery is a lot cheaper than correcting them on the roof.
Sources
Keep these on hand for any standing seam eave detail:
- Residential Standing Seam Install Manual
- Standing seam roof clips (educational materials)
- MBMA: Best practices to comply with whole-building air leakage testing requirements
When any of these conflicts with the panel manufacturer’s own published installation detail, follow the manufacturer’s detail.
FAQ
What does standing seam mean in roofing?
Standing seam describes a metal roof system where adjacent panels connect through raised, vertical seams rather than exposed fasteners. Those seams are joined by snap-lock closure or mechanical seaming with a seamer machine, and the raised profile is what gives the system its name and its weather resistance.
What is eave trim for metal roofing?
Eave trim, often called an eave starter, is the flashing installed at the roof’s lower edge that the first row of panels hooks or hems into. Its profile has to match the panel’s leg and seam geometry so the hem engages fully and water sheds correctly off the eave.
What are the downsides of a standing seam roof?
Standing seam systems require precise layout, matched clips, and correct hem or seam engagement, so installation error at the eave or at clip locations can cause leaks or read-through if the details aren’t followed. Mismatched trim, unsquared layout, or field-notched hems done without care are the most common sources of trouble according to manufacturer installation guidance.
Is eave trim and drip edge the same thing?
They serve a related purpose but aren’t identical. A drip edge on a shingle roof simply directs water off the fascia, while eave trim on a standing seam roof is a matched starter profile that the panel hem or hook physically engages, making profile compatibility with the panel and clips essential in a way a shingle drip edge never has to be.