Contractors’ Metal Roof Takeoffs: 16 Inch Coverage Stops Short Orders
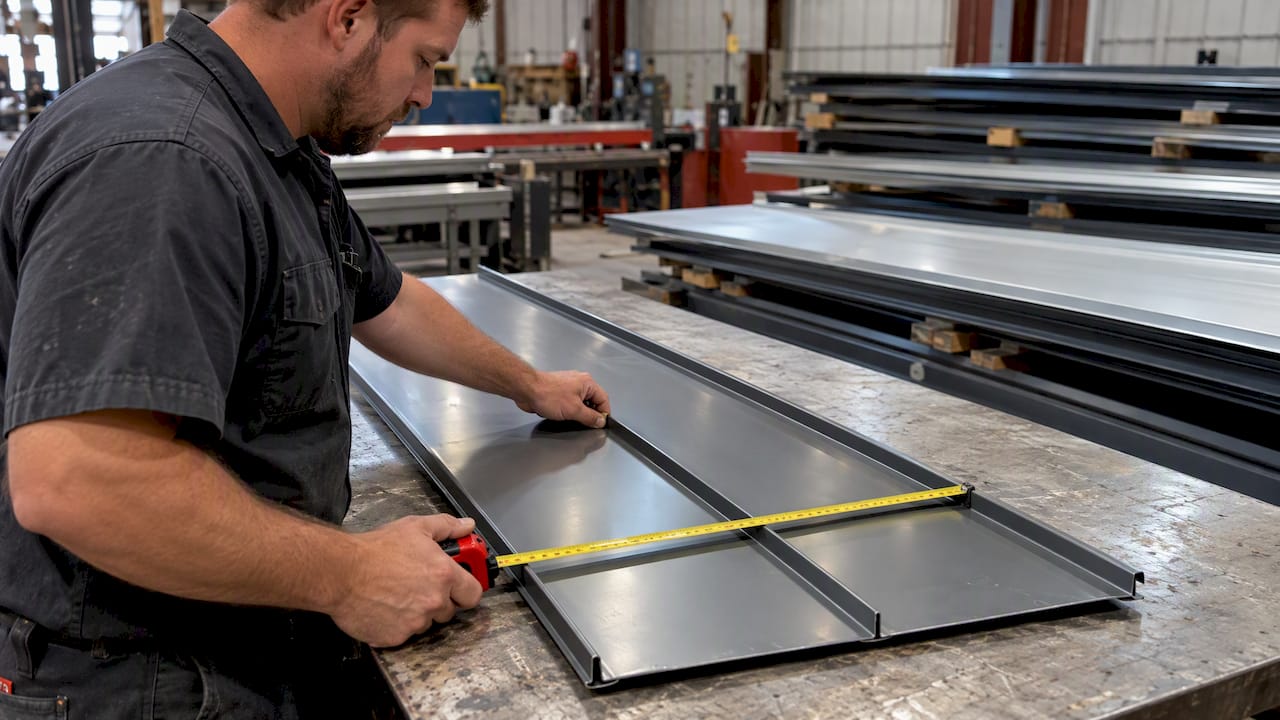
Learn how contractors measure roof planes, use effective panel coverage, plan clips and trim, and turn cut lists into lower waste and smoother installs.
A metal roof takeoff is a quantified materials list, with cut lengths, built from measured roof planes and slope-area calculations, ready to convert into a contractor price and an order. It counts panels, trim, fasteners, closures and flashing as separate line items. Two rules prevent most shortages: divide by the panel’s effective coverage, not its raw width, and apply the right pitch multiplier before you total any area.
TL;DR:
- Calculate each roof plane separately, apply its pitch multiplier to the flat footprint, and count panels by effective coverage, rounding partial panels up.
- Measure eaves, rakes, ridges, hips, valleys, and penetrations individually; sloped edges need pitch correction, and closures follow eave and ridge footage.
- Set clip counts from seam length and engineered spacing, match clips to the panel profile, and price mechanical seaming equipment and labor separately.
- Before pricing, recheck coverage, waste, trim, clip, and fastener quantities; flag measurements taken from plans and verify critical dimensions in the field before fabrication.
Table of Contents
- How do you measure roof planes and calculate slope area?
- How do you calculate panel counts and cut lengths from effective coverage?
- How do you estimate trim, flashing and closures?
- What clips, fasteners and seaming items belong in the takeoff?
- What should you verify before you price?
- Which tools and measuring methods make takeoffs faster?
- What do seaming and clip best practices mean for your estimate?
- Why we cut the list before we order
- Turn your takeoff into an accurate order with us
- FAQ
- Sources
How do you measure roof planes and calculate slope area?
A takeoff is only as good as its geometry. Work through the roof in this order, on plans or on the roof itself:
- Break the roof into planes and sketch each one. Label every plane (A, B, C) so each measurement has a home.
- Measure eave-to-ridge length and plane width for every plane, and record each number next to its sketch.
- Calculate pitch as rise over run, then convert it to a pitch multiplier (the hypotenuse factor for that slope).
- Multiply each plane’s flat footprint by its multiplier to get true slope area. A plane measured from a plan view is shorter than the surface you will actually cover.
- Add the slope areas into a total in square feet, and list hips, valleys and penetrations separately, because they drive trim and flashing rather than panel area.
- Note where each measurement came from, plan or field, and flag anything uncertain for a re-check before it reaches a price.
The same measure, separate, convert and quantify sequence is how RoofScope describes a metal roofing takeoff: every component is quantified individually rather than lumped into one square-footage number. If a roof has many small planes, resist the urge to average them. Each plane gets its own run length, because panel lengths are cut per plane.
How do you calculate panel counts and cut lengths from effective coverage?
Slope area tells you how much metal you need in total. Panel counts and lengths tell the fabricator what to cut. For standing seam, the number that matters is effective coverage, the width a panel covers once its seam is engaged. As RoofScope explains, a panel that is 18 inches wide but covers 16 inches must be counted on the 16-inch figure. Using raw width undercounts panels and leaves you short on the last run.
- Divide each plane’s width by the panel’s effective coverage to get the number of panels across that plane, and round partial panels up.
- Set each panel’s cut length from the plane’s eave-to-ridge run, plus any hem or starter allowance your profile calls for.
- Group identical lengths together so the cut list reads as quantity by length, which is exactly what a cut-and-drop order needs.
- Document your waste factor on the takeoff itself so the person pricing it can see what was added and why.
Coverage widths, gauges and profile details are on our panel specs page, and the full workflow for building cut lists first is in our standing seam takeoff article.
Pro Tip: Give every panel run an ID that matches a labeled plane sketch, so the fabricator and the installer can match each cut to its location without guessing.
How do you estimate trim, flashing and closures?
Panels get the attention, but trim and flashing are where small errors hide. They come from perimeters and details, not from area, so measure them from plane edges and count them from the roof’s features.
- Eave and rake trim: Total the eave edges and the rake edges from your plane measurements. Remember that a gable’s rake runs along the slope, so it gets the pitch multiplier too.
- Ridge, hip and valley trim: Count each ridge, hip and valley run and multiply by its length. Hips and valleys on a sloped plane are longer than their plan-view footprint suggests.
- Step flashing and curb flashing: Count penetrations and walls, then use curb dimensions to size the flashing around chimneys, skylights and equipment.
- Closure strips: Quantify them by the linear footage at eaves and ridges where the panel profile needs to be sealed against weather and pests.
- Starters and special trims: If you plan factory-notched starters, boxed eaves or custom bends, write them on the takeoff as separate items so they are not forgotten at order time.
Our factory-notched eave starter article covers how notched starters change the hem allowance at the eave. Trim and flashing packages are also easier to order when they list lengths by profile, and we cover that on our trim and flashing page.
What clips, fasteners and seaming items belong in the takeoff?
Standing seam panels do not fasten through the face, so the system items are what hold the roof down. Leaving them out is how a takeoff looks complete and still falls short on install day.
- Clip counts: Estimate them from the number of seams and the planned clip spacing, with tighter spacing in the field and edge zones where the engineering calls for it.
- Fasteners per clip: Count the fasteners each clip needs, then add separate allowances for trim and flashing fasteners.
- Seaming method: Mechanical lock panels are seamed in the field with a seamer, which adds equipment and labor time, while snap lock panels generally reduce that seaming work. Record which system you priced.
- Sealants and accessories: List sealant, closure strips and any system-specific parts the manufacturer requires, so the quantities match the profile you are actually installing.
If you are choosing between the two systems, our standing seam metal roofing page outlines mechanical lock and snap lock options.
Pro Tip: Price the seamer and the extra labor as their own line when you quote a mechanical lock roof. Burying them inside the panel price hides the real cost difference between systems.
What should you verify before you price?
Run this check before a takeoff turns into a quote. It takes a few minutes and catches the errors that become change orders.
- Confirm plane totals against the plans and your field sketches, then recheck the arithmetic and each pitch multiplier.
- Verify panel counts using effective coverage, and review every partial panel and the waste factor you applied.
- Compare trim lengths with the measured perimeters, and confirm allowances for hips, valleys and penetrations.
- Cross-check clip and fastener counts against panel seams and the manufacturer’s recommendations.
- Record who verified the takeoff and when, and decide whether a field re-measure is required before fabrication starts.
The most common failures are quiet ones: raw panel width used instead of coverage, flat footprint used instead of slope area, and a hip or valley counted at its plan length. Trimming a margin note (“measured from plan, not verified”) out of the file is its own mistake, because that note is what tells the next person to double-check.
Which tools and measuring methods make takeoffs faster?
Match the tool to the roof and to how much risk the measurement carries.
- A tape measure and a laser distance meter are enough for simple roofs and for spot-checking plan dimensions.
- Photogrammetry and LiDAR speed up large or steep roofs where getting on the surface is slow or unsafe, though you should still verify key dimensions by hand.
- Spreadsheets give you control and a clear audit trail. CAD overlays help when plans are digital, and dedicated takeoff software trims the repetition on multi-plane roofs.
- House A-Z covers tape, laser and LiDAR measuring methods and plan checks, which is useful for choosing a method and validating plan dimensions.
- Long runs and architectural panels are good candidates for cut-and-drop delivery or on-site roll forming, since the cut list from your takeoff feeds straight into fabrication.
Whatever you use, write down whether a number came from the plan or from the field, and leave a margin note on anything uncertain.
What do seaming and clip best practices mean for your estimate?
Seaming and clip choices change labor, equipment and components, so they belong in the takeoff, not just in the install plan. Industry guidance recommends that seaming follow OEM and seamer-manufacturer instructions, including a “seam as you go” approach, seamer tooling matched to the panel, and hand crimping at clip locations. Build time for hand crimping and for seamer start and stop adjustments into your labor estimate.
Clips must be matched to the panel profile and allow for thermal movement, with spacing set by engineering and by testing protocols such as ASTM E1592 and FM/UL standards, because an ill-fitting clip can undermine the assembly’s wind-uplift performance.
When clip performance affects which system you choose, reference the tested assembly rather than assuming one clip fits every profile.
Why we cut the list before we order
My strongest habit is simple: build the panel cut list before anything is ordered. A cut list forces every plane, hem and run length onto paper, and mismatches show up when they are still cheap to fix. When runs are long or the roof is complex, plan cut-and-drop delivery or on-site roll forming so you are not wrestling oversized panels on the roof. Then order trim and flashing together with the panels, so the sequence on the job matches the sequence on the truck.
— Matt Catino
Turn your takeoff into an accurate order with us
Once your takeoff is done, we turn it into custom-length standing seam panels with cut-and-drop delivery, plus on-site roll forming and trim and flashing packages. That means less waste and a simpler order. Send us your cut list and request a quote.
FAQ
How do you take off a metal roof?
Break the roof into planes, measure each one, and apply the pitch multiplier to convert the flat footprint to true slope area. Then calculate panel counts from effective coverage and add trim, flashing, closures, clips and fasteners as separate lines.
What is the 25 rule in roofing?
There is no single universal rule of thumb in metal roofing, and rules of thumb can mean different things in different trades. For a takeoff, rely on your measured slope area and the manufacturer’s coverage and clip guidance.
What is the biggest problem with metal roofs?
On the estimating side, the most common problem is shortages caused by counting panels on raw width instead of effective coverage. Mismatched clips and seaming issues are the usual installation problems, which is why they belong in the takeoff.
How do you do a roof takeoff?
Sketch and label each plane, measure eave-to-ridge length and width, convert to slope area, then quantify panels, trim, flashing and system items. Finish with a verification pass before you price.