Roof-to-Wall Expansion Joints on Metal Roofs: Details

How a roof-to-wall expansion joint works on a metal roof: when you need one, how to flash it, what to check in the spec, and where standing seam fits in.
A roof-to-wall expansion joint is a flexible, weathertight break where a roof meets a rising wall, built so the two can move at different rates without tearing the flashing or letting water in. It allows thermal movement between a roof system and a terminating wall while guarding against wind-driven rain. On a metal roof, the joint matters more than on most surfaces, because metal moves more and your flashing has to move with it.
This guide is for roofing contractors, builders and GCs. It covers when a joint is needed, which details keep it dry, what to check before you order, and how to avoid the mistakes that cause callbacks.
TL;DR
- A roof-to-wall expansion joint lets the roof and wall move independently while staying watertight. Rigid caulk and a tight flashing do not do that.
- The need depends on building length, temperature swing, structure type and whether the wall and roof are carried by different frames. Early design decisions drive it.
- Weatherproof details rely on flexible flashing, intermeshing hooked flanges at least 1 inch deep with mastic, and counterflashing in reglets or receivers.
- Slotted fastener holes, spacing, metal compatibility and factory-made corner transitions are the checks that prevent leaks.
- Custom-length panels and coordinated trim packages make the roof side of the joint easier to get right. Measure the wall side before you order.
Table of Contents
- What a roof-to-wall expansion joint actually does
- When a roof or wall needs an expansion joint
- Standing seam panels and thermal movement at the wall
- Details that keep the joint watertight
- What to check before you order or install
- Common mistakes
- Planning the roof side with custom-length panels
- Our perspective
- Getting started on your next roof-to-wall detail
- FAQ
- Sources
What a roof-to-wall expansion joint actually does
Every building material grows and shrinks with temperature, and a roof deck, its covering and a masonry or framed wall do not do it by the same amount or at the same time. Where they meet, that difference has to go somewhere. If it has no planned place to go, it ends up in the flashing: buckled metal, split sealant, popped fasteners, and a leak at the worst spot on the building.
The joint gives the movement a controlled place to go. A typical manufactured roof-to-wall assembly includes a cover that sheds water, a flexible element underneath that stretches and compresses, and a way to tie into the roof membrane or panel system and the wall. Roof-to-wall products are also designed to limit condensation by insulating against interior building temperatures, which matters because a joint is a gap in the thermal layer.
It helps to separate three things that get mixed up on job sites:
- Expansion joint: a designed gap that allows structural or thermal movement across the building.
- Expansion provision in flashing: a slip joint, lap or hooked seam that lets a long run of sheet metal lengthen and shorten.
- Control of panel movement: clips, slots and fixed points that let a standing seam panel float.
A roof-to-wall detail can involve all three.
When a roof or wall needs an expansion joint
There is no single number that decides it. The Federal Construction Council’s report on the subject states that no nationally accepted procedure exists for precisely fixing the size and location of joints, so designers work from experience and rough calculations. The same report says the structural analysis of a building should include a determination of the need for thermal expansion joints. In practice, the engineer or architect of record makes the call. Your job is to recognize the conditions that point to one and ask before you price.
Conditions that call for a joint
- Long buildings. The longer the continuous run, the more total movement accumulates. Joints are commonly placed at intervals along long structures.
- Different structures meeting. A new addition against an existing building, or a roof framed independently of the wall it butts into, will settle and move differently.
- Different materials. A steel-framed roof against a masonry or concrete wall will not expand at the same rate.
- Large temperature swings. Dark metal in full sun against a shaded or conditioned wall sees a wide range of surface temperatures.
- Wall-supported versus non-wall-supported decks. If the deck is not carried by the wall, the roof can move independently of it, and the transition has to allow for that.
- A joint already exists in the structure. The FCC report says joints should run the entire height of the building, from the top of the foundation through the roof, and must allow uninterrupted relative motion while keeping water and debris out. If the wall has a joint, the roof must continue it. You cannot flash over it rigidly.
When you probably do not need one
A single-story, moderate-length building with a roof and wall on one continuous frame, and a standing seam roof with properly designed clips, often needs only a well-built flashing detail at the wall, not a manufactured joint. Do not guess, though. Check the drawings for a joint note, and ask the designer in writing when the answer is not there.
Standing seam panels and thermal movement at the wall
Standing seam is a floating system. Panels are held by clips that let them slide, so the panel can lengthen and shorten as temperatures change. That movement has to end somewhere, and the wall is often where it ends. If the panel runs right up to a sidewall or headwall and the flashing locks it in place, you have defeated the clip.
Three practical consequences follow:
- Clip sizing and panel length work together. Long panels need clips that allow more travel. We cover sizing against SMACNA guidance in our article on standing seam thermal clips.
- The fixed point matters. Decide where the panel is fixed, usually at or near the eave, so movement is pushed toward the ridge or the wall in a known direction, and detail that end to allow it.
- Flashing must not pin the panel. Sidewall and headwall flashing should overlap the panel without fastening through it, and counterflashing should hang free of the movement.
For the sidewall condition, see our notes on 26 gauge sidewall flashing for standing seam.
Details that keep the joint watertight
Flexible flashing up to a foam rod
When you must close the space between roof and wall without restricting movement, the classic approach is a flexible flashing that is bonded only where it should be. For non-wall-supported decks, the base flashing is adhered to the wall and roof membrane only up to the flexible foam rod, which acts as a water diverter and lifts the flashing so water is directed away from the intersection. Because the sheet is free between those bond lines, it accommodates differential movement. Bonding it all the way across turns a movement joint into a rigid one, and it will tear.
Hooked flanges and mastic
In sheet metal work, lapped or bayonet-type expansion provisions are not always enough. SMACNA-based specifications say that where they cannot be used or would be insufficient, expansion joints should be intermeshing hooked flanges, not less than 1 inch deep, filled with mastic sealant. Counterflashings go in reglets or receivers, so the upper metal covers the lower and sheds water over the joint.
Spacing and corners
The same specification sets a maximum spacing of 10 feet for expansion provisions in sheet metal work and keeps them at least 24 inches away from a corner or intersection. That second rule is the one that gets broken in the field. Corners are where installers want to hide a joint, and corners are where it fails.
Transitions at corners and tees
Where a roof joint meets a wall joint, the geometry is compound. Manufacturers of roof joint systems note that these transitions are critical for watertightness and recommend factory-fabricated transition pieces so the seal stays continuous. The old habit of building these by hand with caulk and flashing is a common source of leaks, which is why prefabricated closures that match both profiles have become the better route.

Layered flanges
Some roof joint systems use a double-level flange, where the upper flange counterflashes the lower one to seal the attachments. The principle is worth borrowing for any metal detail: every layer laps the one below it in the direction water travels, and no fastener sits where water can reach it.
Insulation under the joint
A joint with no insulation beneath it is a thermal bridge and a condensation risk. Manufacturer data covers methods such as a looped membrane that supports insulation batts under a roof joint. Whichever method is specified, make sure the insulation stays in place and does not hold the gap closed.
What to check before you order or install
Use this list when you read the spec or a submittal for a metal-roof expansion joint.
| Check | What to look for |
|---|---|
| Movement directions | Joints for roof-to-wall use can include an articulating cleat that allows four-way movement. Confirm the movement the engineer expects: in and out, shear, or both. |
| Cover material and gauge | Covers are offered in 24- and 22-gauge galvanized steel and in aluminum at .040, .050 and .063 inch, per the same manufacturer. Match the cover to the roof metal where possible. |
| Fastener holes | Slotted holes allow thermal movement while keeping fasteners correctly placed. Fasten in the center of the slot, not against one end. |
| Flexible element | Some covers use an elastomeric bellows over a closed-cell foam backer for multidirectional movement with a weatherproof exterior. Check the product’s rated movement against the design. |
| Dissimilar metals | The specification calls for separation between incompatible metals and corrosive surfaces using self-adhering flashing materials, and requires work that stays watertight without buckling, rattling or loosening. |
| Transitions | Ask for factory-made corners, tees and end pieces instead of field-fabricating them. |
| Joint location | Every expansion provision at least 24 inches from corners, no more than 10 feet apart in sheet metal runs. |
Common mistakes
- Caulking a moving gap. Sealant alone cannot bridge a joint that moves. It splits within a few seasons.
- Fastening through both sides. One screw through a cover into the wall and the roof defeats the whole detail.
- Ending the joint at the roofline. The joint must be continuous through the assembly, so the wall joint, the roof joint and the transition must be designed together.
- Ignoring the substrate. A flexible flashing adhered to dusty, damp or incompatible surfaces will lift.
- Skipping field measurement. Wall conditions drift from drawings. Measure before you cut anything.
Planning the roof side with custom-length panels
A good expansion detail starts with panels that stop where the detail needs them to. Field-cutting long panels to fit a wall creates ragged ends, wasted material and extra labor at exactly the spot that needs precision. When panels arrive cut to length for each plane, the termination at the wall is clean and consistent, and the flashing can be built to a known dimension.
That is the idea behind our cut-and-drop delivery: you send a takeoff with the plane lengths, and panels arrive at the job site cut to those lengths. For tight transitions between a roof and a wall, we also look at shop-fabricated transitions and slope changes, where shop work replaces field labor and cuts callbacks.
If the wall detail calls for custom flashing profiles, our trim and flashing packages are coordinated with the panels, so the trim matches the panel profile and gauge. Supply the wall conditions and we can quote against them.
Our perspective
We supply panels and trim to contractors across Virginia, Maryland, Washington DC, Pennsylvania and West Virginia, and the roof-to-wall line is where most of the questions we hear start. The panel itself is rarely the problem. Trouble starts when the flashing pins a floating panel, when a transition is improvised on the roof, or when nobody asked whether the wall had a joint until the metal was already cut.
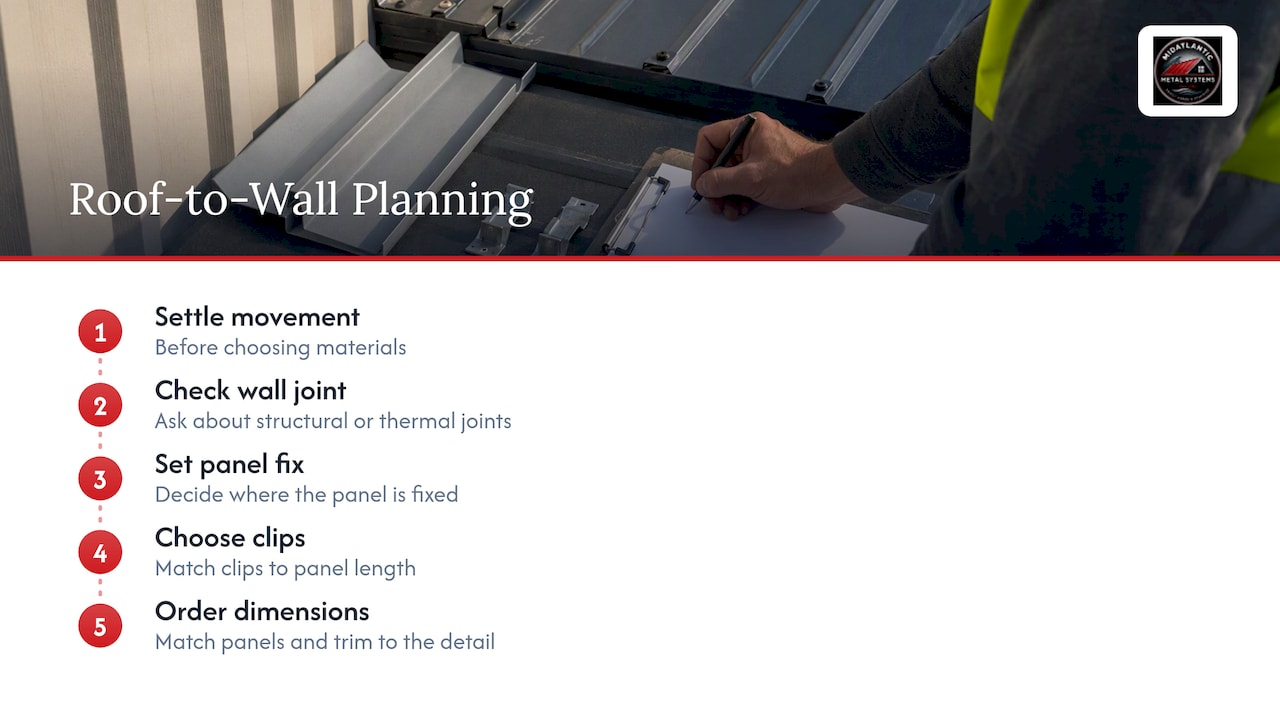
Our view is simple. Settle the movement before you settle the material. Ask the designer whether a structural or thermal joint runs through the wall. Decide where the panel is fixed. Choose clips for the panel length. Then order panels and trim to the dimensions that detail needs, so crews are assembling on the roof, not improvising. We do not make or sell manufactured expansion joint covers. We make the panels and trim on either side of one, and we are glad to talk through that interface before an order goes in.
— Matt Catino
Getting started on your next roof-to-wall detail
Send us your drawings, the panel profile you plan to use (1-inch mechanical lock or 1.5-inch snap lock, in 24- or 26-gauge steel) and the wall conditions. We will help with takeoff and trim, and you can see the full range on our standing seam metal roofing page or through contractor supply. For projects where access or length makes delivery hard, on-site roll forming is another option to ask about.
FAQ
What is an expansion joint on a roof?
It is a flexible, weathertight break that lets two parts of a roof, or a roof and a wall, move independently as temperatures change. It carries a cover that sheds water and a flexible element beneath that stretches and compresses. Without it, the movement tears flashing or splits sealant.
Do I need an expansion joint in my wall?
That is a design decision for the engineer or architect of record. Long buildings, different structures meeting, mixed framing materials and large temperature swings all point toward one. If the drawings show a joint in the wall, the roof detail has to continue it rather than bridge it.
How do you fill the space between a roof and a wall?
Use a flexible flashing bonded to the wall and roof only up to a foam rod, so the sheet stays free to move in between. Do not fill the gap with rigid sealant or fasten flashing to both sides. Where sheet metal expansion provisions are needed, hooked flanges at least 1 inch deep with mastic are the specified approach.
Do metal roofs need expansion joints?
Standing seam panels handle most of their own movement through sliding clips, so many roofs need only a correct wall flashing. A manufactured joint comes in when the building structure has a joint, or when roof and wall move independently. Size the clips for the panel length, and check the design for joint notes.
Sources
- Perma-Tite Expansion Joint, Roof to Wall
- Section 07620, Sheet Metal Flashing and Trim
- Roof expansion joint selection guide
- Manual Elements, Professional Roofing
- RoofJoint Tech Data Sheet
- Expansion Joint Cover, Style CF/EJ, Curb to Wall
- Expansion Joints in Buildings: Technical Report No. 65