Winter Metal Roof Installation: A Contractor's Cold-Weather Guide
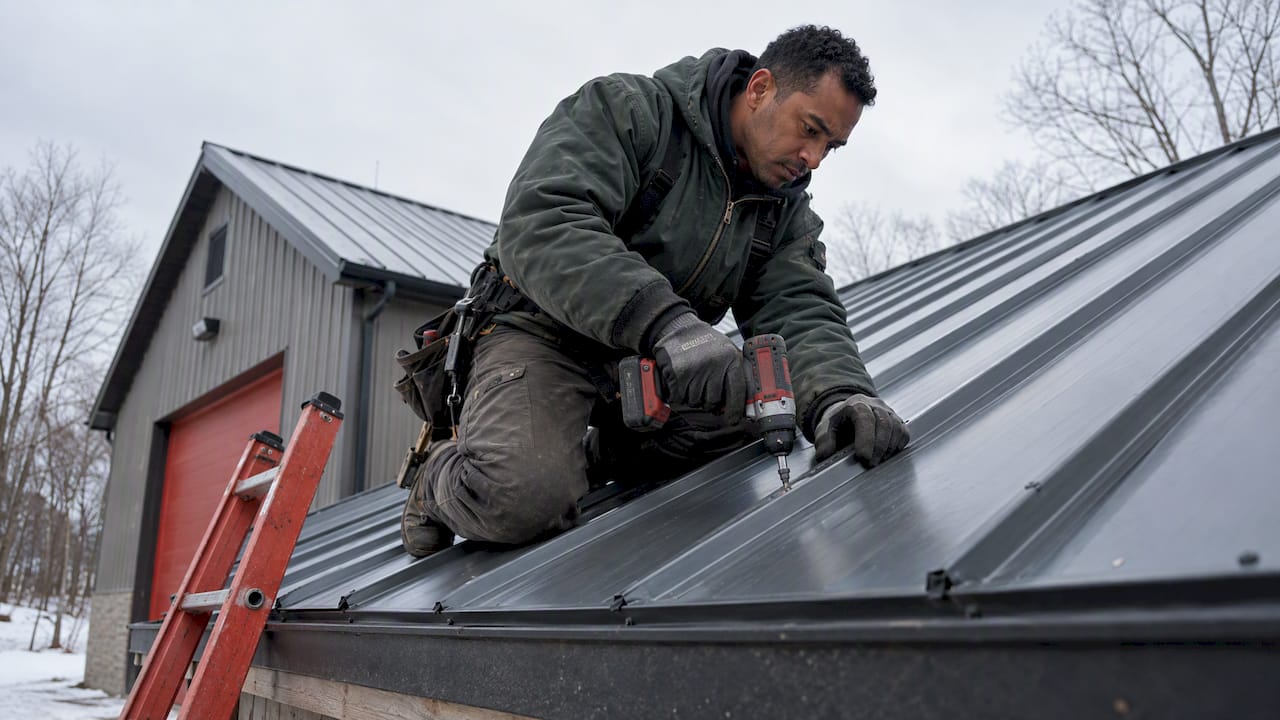
Can you install standing seam metal roofing in winter? Weather stop limits, cold-weather panel handling, snow guards and safety steps for contractors.
Yes, you can install a standing seam metal roof in winter. Steel panels don’t cure or set the way shingles, membranes or adhesives do, so cold is rarely the problem on its own. The problems are ice and frost on the deck, wet substrates, wind on large panels, cold sealants and fasteners, and crews working on a slick surface. Plan for those and a winter roof goes on as well as a July roof. Ignore them and you get callbacks.
This guide is for roofing contractors, builders and general contractors in the Mid-Atlantic. It covers when to stop work, how to prepare the deck, how to store and handle panels, what to check in the manufacturer’s instructions, how to place snow retention, and how to keep the crew safe.
TL;DR
- Cold-weather precautions start at 40°F. Stop for frost, ice or snow on the deck, a wet substrate, rain, or constant winds or gusts above 15 mph.
- Keep the deck clean, dry and frost-free, and finish each roof section every day so nothing is left open overnight.
- Keep panels, sealant tape and trim out of unheated trucks and off the ground. Bring them to the roof as you use them.
- The panel manufacturer’s minimum temperatures and bulletins override general rules of thumb. Read them before the job starts.
- Custom-length, cut-and-drop panels cut winter exposure because less cutting and handling happens on the roof.
Table of Contents
- Can you install a standing seam roof in winter?
- When to stop: weather limits that matter
- Preparing the roof and jobsite
- Storing and handling panels, tape and trim in the cold
- Check the manufacturer’s instructions before you start
- Installing standing seam in cold weather, step by step
- Safety precautions for winter roof work
- Snow guards and snow retention
- Perspective: why winter jobs are won before the crew arrives
- Ordering for a winter job
- FAQ
- Sources
Can you install a standing seam roof in winter?
Yes, with limits. Installers in cold states do this every year, and the question is never “winter or not” but “is this day, on this roof, workable?” Acceptable conditions come from a combination of ambient temperature, wind chill, humidity and cloud cover, and the roof should be inspected before work starts to confirm those conditions remain safe and suitable. That guidance is written for a different roofing system and market, so use it as a method rather than a rulebook for metal. The principle carries over: judge conditions at the roof, not from the forecast app.
In practice, the Mid-Atlantic winter is a good fit for metal. Most days in Virginia, Maryland, DC, Pennsylvania and West Virginia fall in a workable band, with a few days of hard freeze, ice or snow that are clearly no-go. The skill is telling the two apart quickly and not forcing the marginal ones.
When to stop: weather limits that matter
Two published guides give useful numbers. A construction quality guideline from AECOM says cold-weather precautions begin when temperatures drop below 40°F. A roofing contractor’s weather plan lists the stop conditions: imminent dangerous weather, ongoing rain, a wet substrate, frost, ice or snow on the substrate, a 30% or greater chance of rain, audible thunder, constant winds or gusts above 15 mph, or temperatures at 40°F and falling.
Those are conservative, and they make a good default crew policy. Here is how they translate to a standing seam job.
| Condition | What to do |
|---|---|
| Temperature under 40°F | Start cold-weather procedures: warm materials, shorter work sections, extra checks on sealant and fasteners |
| Frost, ice or snow on the deck | Stop. Clear and dry the surface, wipe to confirm no hidden frost, then resume |
| Wet substrate or active rain | Stop. Moisture trapped under panels causes problems you will not see until later |
| Constant wind or gusts above 15 mph | Stop panel handling. A long, thin panel acts like a sail |
| Thunder | Everyone off the roof |
| Rain chance of 30% or more | Don’t open up more roof than you can dry in |
Panel manufacturers may set their own minimum temperatures for specific components, so these numbers are a floor for your policy, not a substitute for the product literature (more on that below).
Wind deserves extra respect with custom-length panels. A 30-foot panel in a 15 mph gust is hard to control, and cold hands make it worse. If the wind is up, use the day for staging, trim prep or layout instead.
Preparing the roof and jobsite
Good winter work is mostly preparation. Manufacturer guidance for cool-weather application recommends that crews lay out the roof area and materials in advance, keep the substrate clean, dry and free of ice, dew or water, complete each section daily, and install water cut-offs at exposed edges. That bulletin is written for shingles, but the logic applies to any steep-slope job.
Check the deck first
The substrate must be clean, dry and frost-free, and you should wipe surfaces to remove frost you can’t see. On a cold morning, a deck can look dry and still carry a thin film of frost or dew. Run a rag over a few spots in shade and on the north slope before you lay underlayment.
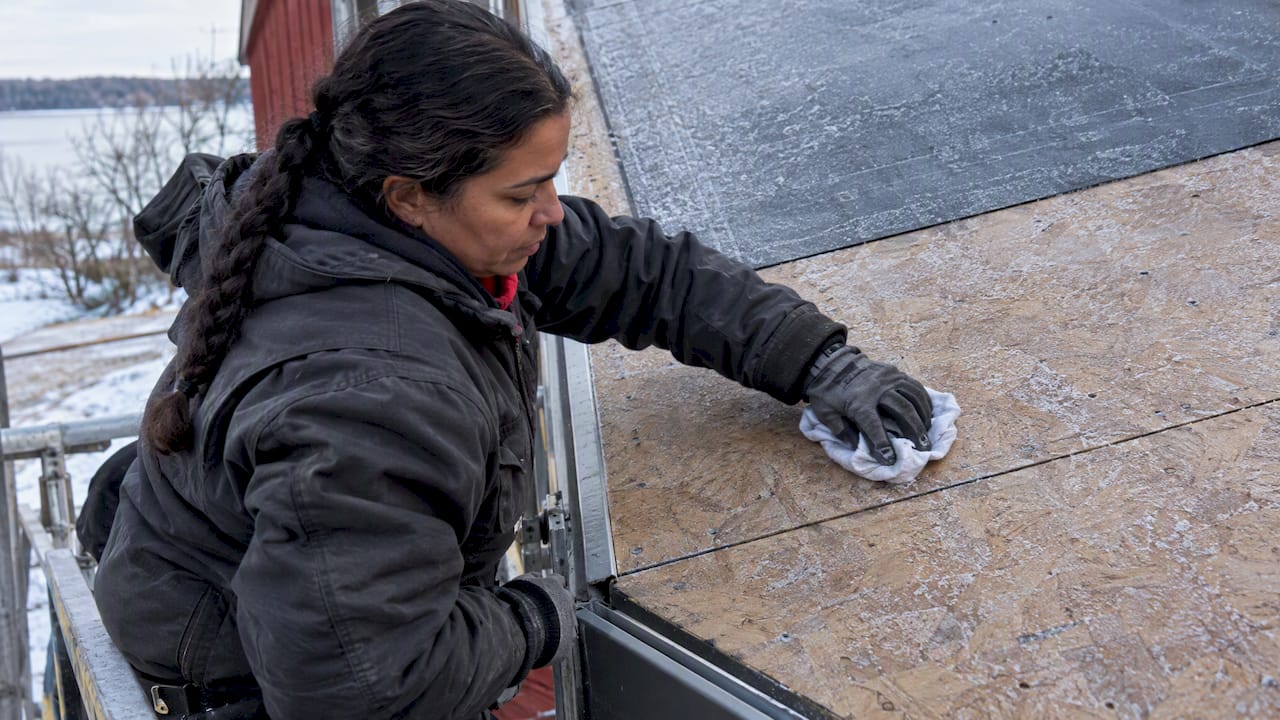
While you are on the roof, inspect the structure too. Look for soft sheathing, fastener pops, and damage from prior leaks. If the underside of the deck was ever sprayed with foam, this write-up on metal roof spray foam issues explains how it can hide corrosion and trap moisture, which is worth knowing before you fasten new panels to that deck.
Plan the day in sections
In winter, don’t tear off more than you can dry in. Set a daily goal in complete sections, such as one full slope or a defined run, and finish with underlayment, panels, trim and closures in place. Guidance for winter roofing says to finish roof sections daily and use watertight day/night joints. A temporary tie-in at the end of the day with an exposed edge sealed off is far cheaper than drying out a soaked deck the next morning.
Stage panels before the crew climbs
Order panels in the lengths the roof needs so they go from the truck to the deck with minimal field cutting. Our cut-and-drop delivery is built for this: panels arrive on site cut to length, and the crew spends cold hours installing rather than measuring and cutting. Less cutting also means fewer metal shavings on the roof, which matters in any season because shavings left on a painted panel can rust and stain.
Storing and handling panels, tape and trim in the cold
Materials are where winter jobs quietly go wrong. Cool-weather bulletins say to store materials in a weather-protected environment, clear of the ground and moisture, use a heated warehouse where possible and warming boxes or suitable equipment on site, and use materials soon after removing them from protected storage. A winter roofing guideline adds that you should protect materials from freezing, not store them outside or in an unheated truck, and that a heated shanty on the roof may be needed.
For a standing seam job, that translates into a short checklist:
- Panels: Keep bundles off the ground on blocking, covered, and sloped slightly so water drains. Snow and meltwater trapped between stacked panels can leave staining on the finish.
- Sealants and butyl tape: These get stiff and lose tack when cold. Keep them in a warm cab or warming box and take out only what you will use in the next stretch.
- Closures and clips: Keep them dry and sorted. Fumbling with gloves is where parts get dropped off the roof.
- Trim and flashing: Stage it by elevation so you aren’t digging through a frozen pile. A coordinated trim and flashing package ordered with the panels keeps the eave, rake, ridge and sidewall pieces together and matched.
Also expect thermal movement. Steel expands and contracts with temperature, and a panel installed at 35°F will be a little shorter than the same panel at 85°F. Standing seam clips are designed to let panels float, but that only works if the clips are set correctly. Don’t pin a panel tight in cold weather just to keep it from wandering. Follow the clip spacing and fastener instructions for the system.
Check the manufacturer’s instructions before you start
General winter practice gets you most of the way, but the manufacturer decides what is acceptable for warranty. Winter roofing guidance tells contractors to check the manufacturer’s minimum substrate temperatures, product-specific winter instructions and technical bulletins. For metal, read these items before the first panel goes up:
- Minimum application temperature for sealant tape and liquid sealants
- Any limit on seaming or crimping panels at low temperatures, and whether the seamer needs adjusting
- Whether the underlayment you chose has its own minimum installation temperature
- Fastener and clip requirements, including any specific guidance for thermal movement
- Handling guidance for the coating, such as how to avoid scratches on cold, hard paint
We supply 1-inch mechanical lock and 1.5-inch snap lock panels in 24-gauge and 26-gauge steel, made with Englert metal systems. If you are ordering through us, ask for the current Englert installation literature for your panel and read the cold-weather notes alongside the job spec. Our team can walk you through the differences when you compare the panel profiles.
A quick note on profile choice in winter: a snap lock panel goes together by pressing the seams, while a mechanical lock panel is seamed with a tool. Both can be installed in cold weather within the manufacturer’s limits, but the mechanical lock process asks more of the crew’s hands and equipment, so factor the extra time into a short winter day.
Installing standing seam in cold weather, step by step
The steps are the same as any season. What changes is the pace and the checks.
- Walk the roof and the forecast. Confirm the deck is dry and frost-free and conditions fit your stop list.
- Lay out the roof. Establish square from the eave and rake, and snap lines. In winter, do layout the day before when possible, so the cold, short morning is spent installing.
- Install underlayment in sections you can finish. Use an underlayment rated for the temperatures you expect, and lap it per instructions.
- Set eave trim, then the starter panel. A factory-notched panel can speed up the eave. See how factory notched eave starters cut hemming time on site.
- Apply sealant tape from the warm supply. Take small amounts, press firmly, and don’t leave unrolled tape exposed on a frozen roof.
- Set and fasten panels. Follow clip spacing, keep seams clean and dry, and check alignment every few panels. Cold hands and gloves make it easy to drift.
- Close the day. Finish the section, seal the exposed edges, remove loose shavings, and secure any leftover panels against wind.
Details such as sidewalls and slope changes are where weather gets in during a rushed winter day. Prepare those pieces in advance. Our notes on 26-gauge sidewall flashing and slope transitions cover how factory-formed parts reduce field labor and rework. If you are building over rigid insulation, our guide to a code-ready metal roof over insulation is worth a read before the deck is closed in.
Safety precautions for winter roof work
Frost, snow, wind and cold hands all raise the risk of a fall, and a fall remains the main danger in roofing. Metal panels are slick even when dry, and a thin film of frost makes them worse.
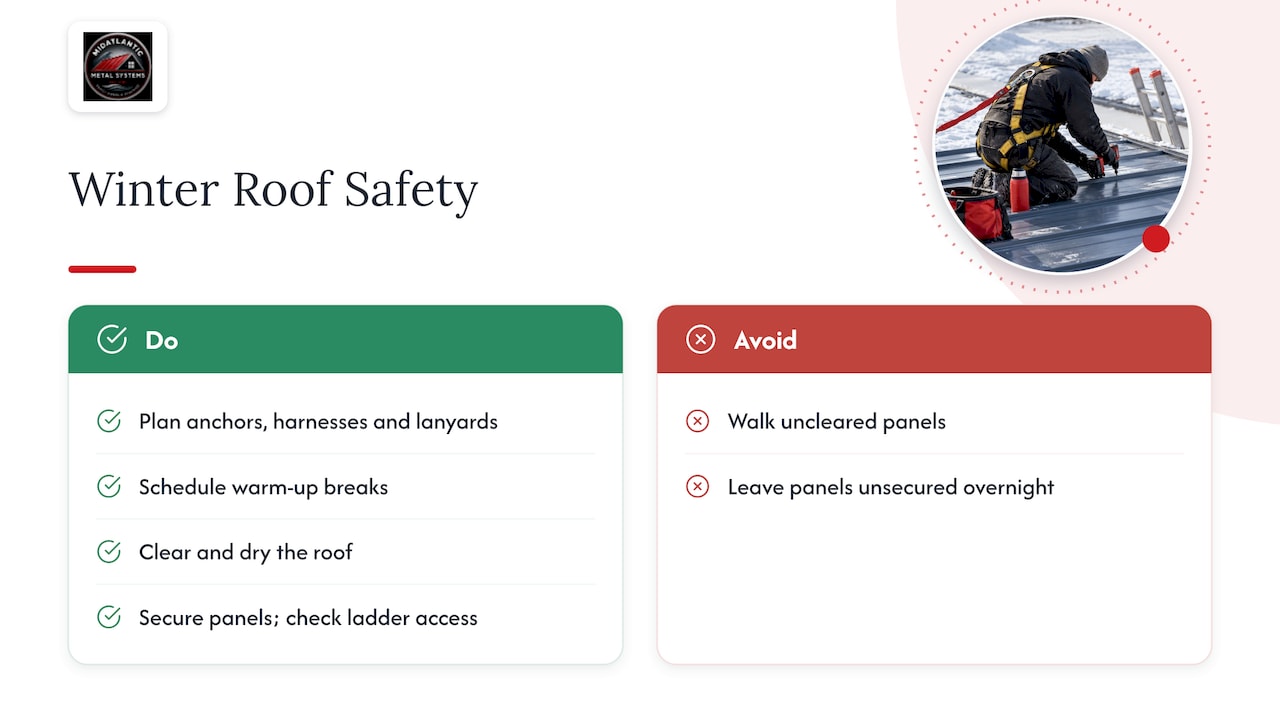
Fall protection. OSHA’s roofing guidance reminds employers that they must provide the right fall protection equipment and train workers to use it, and it cites the steep-roof rule at 29 CFR 1926.501(b)(11) for slopes above 4:12. Metal roofs are often steeper than that, so plan anchors, harnesses and lanyards before the crew goes up, not after a bad morning.
Cold stress. The same OSHA publication points to the agency’s winter weather resources for cold injuries and illness. Build warm-up breaks into the schedule, give the crew insulated gloves that still allow a grip on tools, and keep warm drinks and a heated space close.
Surface hazards. Treat any frost, ice or snow as a reason to stop, as in the stop list above. Don’t walk panels that haven’t been cleared. Keep the crew off the roof until the deck is dry enough that footing is reliable.
Wind and panel handling. Assign enough people for the panel length, hold panels flat on the roof, and put weight or fasteners on anything left overnight. A gust catching a long panel can pull a worker off balance.
Ladders and access. Frozen ground, ice on rungs and snow on the ladder base are easy to miss. Clear and check the access point each morning.
This section reflects OSHA’s general requirements. Your site safety plan, your competent person and your insurer’s requirements decide the specifics for each job.
Snow guards and snow retention
If you are installing in winter in snow country, the roof will see snow almost as soon as it is finished, so snow retention needs to be on the plan, not an afterthought. Smooth metal sheds snow readily, which can be a problem over entries, walkways, lower roofs, gutters and driveways.
Manufacturer guidance for snow rail systems says that placement and quantity should account for region, roof pitch, run lengths and roof features. It also says to know the seam size and thickness before selecting a guard, and to follow the specified torque procedure. Over-tightening can damage the guard, resulting in failure.
Some practical points for standing seam:
- Pick the guard for the seam. A clamp that fits a 1.5-inch snap lock seam is not necessarily right for a 1-inch mechanical lock seam. Confirm with the guard maker’s chart.
- Respect the torque spec. In cold weather, set screws and metal parts behave differently in the hand. Use a calibrated tool instead of feel.
- Mind the warranty. Check how the guard attaches and whether the panel finish warranty allows it. Fastening through a panel creates a penetration that clamp systems avoid.
- Adhesive systems need clean, warm, dry panels. Use only the cleaner the adhesive maker specifies, and don’t try to bond to cold or frosty paint.
- Add snow retention in the same season as the roof. Retrofitting on a snowy roof is its own hazard.
If the install is happening at the same time as a heavy snow period, ask your snow guard supplier for a layout based on your pitch and run length before you order the panels.
Perspective: why winter jobs are won before the crew arrives
We supply standing seam to contractors across Virginia, Maryland, Washington DC, Pennsylvania and West Virginia, and we see the same pattern when winter work goes well: the work is decided in the shop and the yard, not on the roof.
Short days and cold hands punish every minute spent measuring, cutting and hunting for the right trim piece. A custom-length panel delivered to the job, a trim package that matches the panels, and a takeoff that is right the first time all protect the thing you can’t get back in January: usable daylight on a dry deck. That is why we focus on cut-and-drop delivery and coordinated trim and flashing packages for contractors.
On challenging sites, such as long runs, tight access or a roof too long for a truck, we can bring on-site roll forming so panels are formed to the length the roof needs, right where you are installing. Our advice for the winter season is simple. Order early, confirm lengths twice, have the manufacturer’s cold-weather notes in the truck, and set a stop policy with the crew before anyone climbs. Then follow it, even when the schedule pushes back.
— Matt Catino
Ordering for a winter job
Winter schedules leave little slack, so a few ordering habits matter more than they do in summer:
- Lock in measurements and lengths before the weather turns. Re-measuring on a frozen roof is slow and dangerous. Panel length limits matter too; see how long standing seam panels can be before you design long runs.
- Order the whole package together. Panels, trim, flashing, fasteners and accessories should arrive as one coordinated order so the crew is not stalled by a missing piece.
- Plan the drop. Tell us where the truck can get in and where the material should be staged, off the ground and covered.
- Leave weather float in the schedule. Frost and wind days will happen. Padding the plan keeps you from forcing bad days.
If you are a roofing contractor, builder or general contractor planning a cold-season standing seam job, send us your takeoff through our contractor supply program. We’ll help you with panel lengths, trim and delivery timing for the site. Prices depend on the project, so request a quote for yours.
FAQ
Can you put a metal roof on in the winter?
Yes. Metal panels don’t depend on warm weather to cure, so the limits are practical: a dry, frost-free deck, manageable wind, workable sealant and safe footing. Follow the manufacturer’s minimum temperatures and stop work for ice, snow, rain or high wind.
What temperature is too cold to install a metal roof?
There is no single number for every product. Winter roofing guidance starts cold-weather precautions below 40°F, and manufacturers set their own minimums for sealants, underlayment and other components. Check those documents for your specific system before the job starts.
Do I need snow guards on a standing seam roof?
Often, yes, wherever sliding snow could hurt people or property, such as over doors, walkways, lower roofs and gutters. Placement and quantity depend on region, pitch, run length and roof features, so get a layout from the snow guard manufacturer and follow its torque and mounting instructions.
How do I keep panels and sealant usable in cold weather?
Keep them out of unheated trucks and off the ground, store them in a protected, heated space where possible, and bring out only what you will use soon. Warming boxes on site help with tape and sealants that stiffen in the cold.
Sources
- IKO weather conditions and material storage guidance
- AECOM winter roofing installation guidelines
- Standard Exterior Solutions inclement weather plan
- GAF cool weather application precautions
- Berger S-Rail snow retention installation guide
- OSHA Protecting Roofing Workers (OSHA 3755)