Standing Seam Panel Endlap Details: When to Use Them
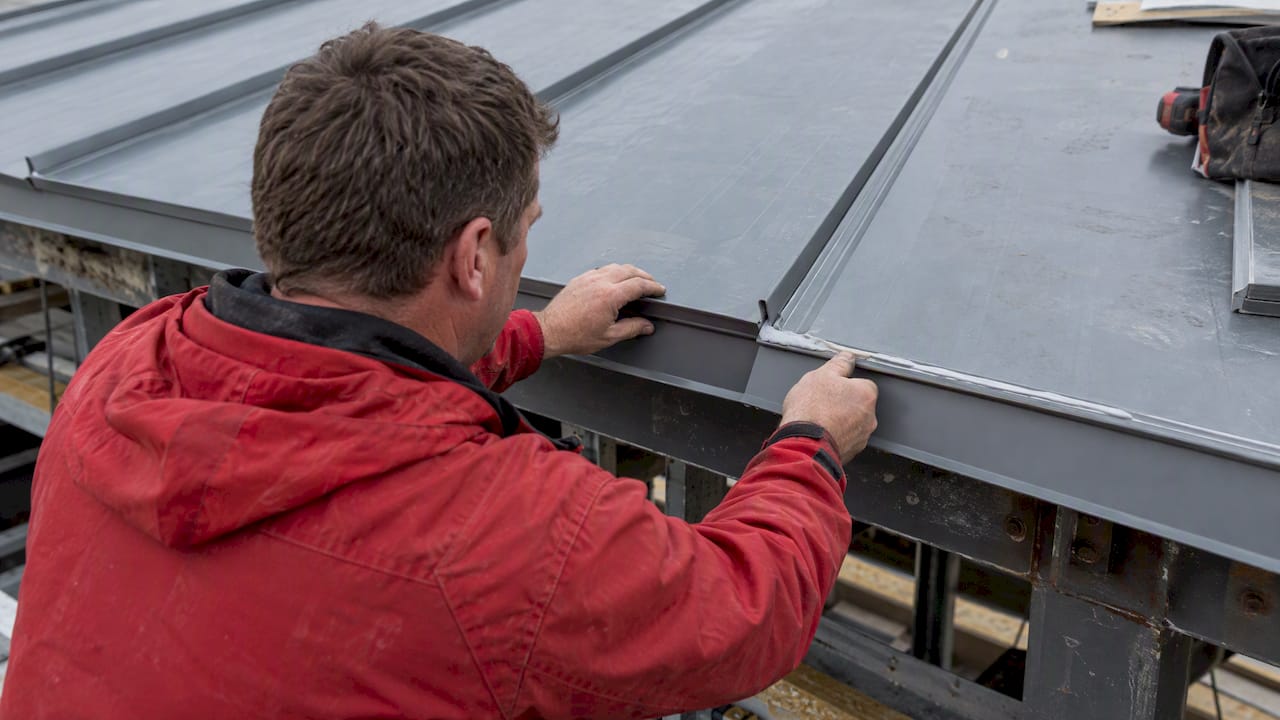
How standing seam endlaps work: when to avoid them, purlin location, sealant, back-up plates, fasteners and field checks, plus how custom lengths cut them out.
An endlap in a standing seam roof is the joint where an upslope panel overlaps a downslope panel end to end, over a structural support. Done right, it is a sealed, fastened, engineered joint. Done in the field with improvised parts, it is the most common place for a standing seam roof to leak. The best endlap detail is usually the one you design out by ordering panels long enough to run eave to ridge. When the run is too long or access rules it out, the details below decide whether the joint holds.
TL;DR
- Avoid endlaps wherever panel length, shipping and thermal movement allow a single eave-to-ridge panel. Every endlap is a potential leak path.
- When you need one, it must land over a purlin or other structural support, with a back-up plate, endlap sealant and purpose-made fasteners.
- Factory prep (cutbacks, swaging, notching) matters. Field-modifying panels without it raises the risk of sealant failure and fastener strip-out.
- Check framing alignment and clip spacing before the first panel goes down, because a perfect endlap cannot fix a misaligned substructure.
- Always follow the panel manufacturer’s detail for your profile and slope. Generic rules of thumb are not a substitute.
Table of Contents
- What an endlap is, and why it is the weak point
- Can you avoid the endlap? Start with panel length
- Anatomy of a correct endlap
- Factory prep: cutbacks, swaging and notching
- Insulated or not: what changes
- Before you build the lap: check the substructure
- Installation sequence in the field
- Our perspective: design the lap out, or order it right
- Order panels that fit the roof
- FAQ
- Sources
What an endlap is, and why it is the weak point
Standing seam panels run in the direction of the slope. The seams between panels are the watertight feature, and the panel itself is continuous. An endlap interrupts that. You now have a horizontal joint across the water path, with two panel ends, sealant, fasteners, and often a pair of overlapping seam geometries that were never designed to stack.
That is why one panel manufacturer’s guidance on its mechanically seamed system is blunt: it does not recommend an endlap on that panel, calling it a difficult installation that could leak, and advises one long sheet. We cannot link a page we did not open, so treat that as a pointer to check your own manufacturer’s literature, not as a rule for every profile.
The practical takeaway is simple. Treat the endlap as an exception that needs a reason: a run too long to ship, a roof too tall to handle in one piece, or a jobsite with no path for a long panel.
Can you avoid the endlap? Start with panel length
Most standing seam panels are roll formed and cut to length, not sold in fixed sizes. Custom panels can be produced in small length increments up to 40 feet or more, which is why a single panel commonly covers the full distance from eave to ridge on residential and many light commercial roofs.
Three things push you toward an endlap anyway:
- Transport. Truck length, site access and crane or hand-carry limits cap what you can deliver and lift.
- Thermal movement. The longer the panel, the more it moves. The same panel length guide shows steel moving roughly 5/16 in. over a 40 ft panel. Clips must accommodate that. See our notes on standing seam clip spacing for panels over 10 ft and sizing thermal clips.
- Roof geometry. Very long rafter lengths on large commercial roofs may exceed what any panel can do.
If the real obstacle is access, there is a third route: forming panels where you are building. On-site roll forming lets a crew produce long panels at the jobsite, so a delivery truck’s length stops being the limit. We explain how that works in On Site Roll Forming Explained.
Anatomy of a correct endlap
Manufacturer details differ by profile, but the sound ones share the same parts. The research below comes from published design guides for insulated metal panels and standing seam systems. Insulated panels carry extra details (foam core, liners), but the structural logic applies to standing seam roofs as well.
It sits over a support
An endlap assembly must occur over a structural support such as a purlin, so the joint is stable under foot traffic, wind and thermal cycling. A standing seam endlap floating between purlins is a joint that flexes, and a flexing sealed joint fails. Purlin layout is the first decision, so see our purlin spacing checklist when you plan where laps can land.
Back-up plate
The same guide calls for a robust back-up plate under the exterior skin to prevent fastener strip-out. It gives 16-gauge steel as the typical specification for that plate. A 24-gauge or 26-gauge panel is thin metal. Without a plate you are asking two layers of thin skin to hold a compressed sealant bead against wind load.

A published architectural detail for another roof system shows the same idea in different words: a cinch plate factory punched for fasteners, a back-up channel and a secondary endlap sealant. Names vary by manufacturer. The function does not.
Sealant
Use the sealant the manufacturer specifies. The design guide describes a specialty endlap sealant designed for uniform compression. That rules out a general-purpose bead from the truck. Another published endlap description shows a strip of mastic bedded on the lower panel that engages a matching strip on the overlapping panel, so check the exact sequence and strip locations in your manufacturer’s detail.
Practical points that apply to any sealed lap:
- Clean and dry the surfaces and keep the sealant off the dust and debris of the work area.
- Do not stretch or thin the sealant to cover more distance.
- Fasten and compress as the detail states, with no gaps along the full panel width.
Fasteners
The guide specifies engineered endlap fasteners, often self-drilling screws with EPDM sealing washers and stainless steel backers, to handle movement. Pattern, count and spacing come from the manufacturer’s detail. Do not substitute with whatever screw is in the pouch.
Overlap dimension
There is no single dimension. A published insulated panel guide uses a 3 in. overlap of the exterior faces with the core and interior faces butt jointed. A Florida low-slope guide puts the range from 6 to 12 inches depending on profile. Exposed-fastener panel makers commonly set 6 in. as a minimum end lap, and that is a different system from hidden-clip standing seam. For standing seam, the only correct number is the one on your profile’s detail drawing.
Factory prep: cutbacks, swaging and notching
Overlapping two standing seam panels means the ribs of one must sit over or around the ribs of the other. Manufacturers handle that with factory operations:
| Operation | What it does |
|---|---|
| Cutback | Removes insulation or trims the panel end so the faces can overlap or butt correctly |
| Swaging | Slightly reshapes the panel end so it nests over the lower panel with clearance |
| Notching | Relieves the rib or seam so it aligns correctly at the lap |
Published guidance is plain on this point: factory-prepared components are critical, and field-modifying panels without them increases the likelihood of sealant failure, fastener strip-out and weathertightness failure. The same goes for the eave end. Our write-up on factory notched panels that cut eave hemming covers the same principle at the other end of the panel.
Insulated or not: what changes
The top search results are mostly insulated metal panel (IMP) guides, so a note for contractors using them. For IMPs, the industry’s selection guideline says panel lengths are limited by shipping and handling, so an endlap joint will sometimes be necessary, with the liner typically butt jointed rather than lapped. On a plain standing seam roof over deck and underlayment, there is no core to cut back, but the sealant, fastener and support rules are the same.
Before you build the lap: check the substructure
Endlap leaks are often blamed on the endlap. Frequently the cause is below it.
- Framing alignment. Structural supports must be within code tolerances before panel installation. Industry guidance warns that misaligned framing, for example deviations over 3/8 in. across a 120 in. run, transmits stress into panel joints and endlaps. Check the numbers against the source for your project.
- Clips. The Metal Construction Association stresses that clip selection and spacing should come from a clip analysis, with field, edge and corner zones treated differently. Wrong clips cause buckling, fastener distress and noise. Our guide to matching clips to profile, run and substrate goes deeper.
- Slope and code. Low slopes are less forgiving of any lap. Confirm the slope limits of your system and the code in your jurisdiction. Our IBC metal roofing checklist is a place to start.
Installation sequence in the field
- Confirm the lap location sits over the support, and that panels above and below are the correct, factory-prepared pair.
- Install the lower panel, clips and back-up plate per the detail.
- Apply endlap sealant exactly where the drawing shows, in the continuous bead or strip the manufacturer specifies.
- Set the upper panel, orient ribs correctly (some profiles are asymmetrical, and one published system guide warns that panels must all be oriented in the same direction).
- Fasten with the specified endlap fasteners and compress the sealant as the detail requires.
- Hand-crimp at each clip and endlap right away. Field protocol in that same guide calls for it to prevent wind uplift before final seaming.
- Seam the panels, then inspect the lap before moving on.
Safety: stay on the flat, supported areas of the panel and off the ribs and unsecured sections until the roof is fully fastened, as that guide directs. Follow your own fall protection plan on every roof.
Our perspective: design the lap out, or order it right
We supply cut-and-drop standing seam panels to contractors across Virginia, Maryland, Washington DC, Pennsylvania and West Virginia, and the endlap conversation comes up on nearly every long-run takeoff. Our view is simple.
First, ask whether the lap is needed at all. Custom-length panels cut to your takeoff and delivered to the job site, or panels formed on site, remove the joint on many roofs. That is fewer leak paths, less sealant to get right, and less waste than cutting stock lengths.

Second, when a lap is unavoidable, make it a planned detail. Decide it during takeoff, not on the roof with a drill. Put the lap over a purlin, order panels that arrive with the correct prep, and order the trim and flashing as a coordinated package so the lap, the ridge and the eave all work with each other.
Third, send us the roof. Panel profile (1-inch mechanical lock or 1.5-inch snap lock), gauge (24 or 26), run lengths, slope and access all affect what we recommend, and the final authority is always the manufacturer’s detail for the system being installed.
— Matt Catino
Order panels that fit the roof
If your roof is a candidate for single-length panels, send us your takeoff. We deliver custom-cut standing seam panels directly to the job site, and we can coordinate trim and flashing in the same order. For long runs and tight access, ask about on-site roll forming. Our contractor supply team handles takeoff support. These services are for contractors, builders and construction professionals, and pricing is quoted per project.
FAQ
How long should a standing seam endlap be?
There is no universal number. Published figures range from 3 in. on certain insulated panels to 6 to 12 in. on other profiles, and exposed-fastener panels use different rules again. Use the dimension on your manufacturer’s detail for your exact profile and slope.
Can you make an endlap in a standing seam roof without a purlin?
No. Design guidance says the endlap must occur over a structural support such as a purlin so the joint stays stable. A lap in open span flexes, and flexing breaks the sealant.
Is it better to use one long panel instead of an endlap?
Where shipping, handling and thermal movement permit, yes. A single panel has no horizontal joint across the water path. Some manufacturers advise against laps on certain profiles. If length is the problem, on-site roll forming or custom-length delivery can solve it.
Can I field-cut panels to make the lap?
It is risky. Published guidance says that modifying panels in the field without factory cutbacks, swaging or notching raises the odds of sealant failure, fastener strip-out and leaks. Order prepared panels instead.
Sources
- CFR roof architectural design guide (endlap assembly, back-up plate, factory prep)
- Metal Construction Association: selection guideline for insulated metal panels
- Metal Construction Association: insulated metal roof panels, IBC 2018
- Metal Construction Association: standing seam roof clips
- 2½ in. SSR roofing system detail pages (ARCAT)
- Roof system architectural details with endlap detail (ARCAT)
- Metal roofing panel lengths and thermal limits
- How to overlap metal roofing